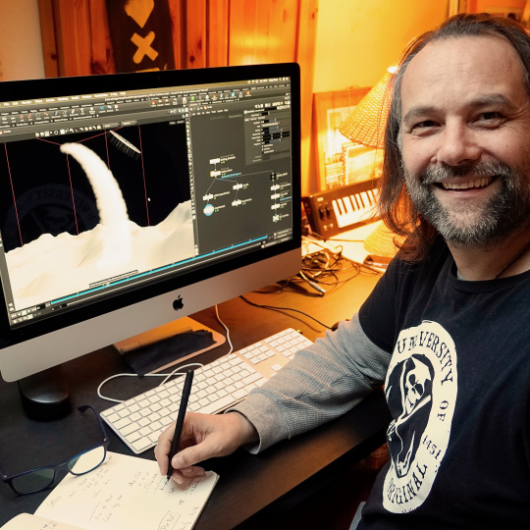
Today I taught my final Houdini FX class for this semester’s block for SAE Germany. After 10 weeks of talking about Houdini Fundamentals, Vex, Vellum, RBDs, Fluids, and Pyro, I have now to say “Goodbye” and “All the Best” to my motivated students. It was such fun and I wish you all the best in this exciting industry. 

We started the course at the first of December and those were the topics my students learned from me:

  • Houdini Basics
  • Particle Simulation (POP)
  • Vellum Simulation
  • Rigid Body Dynamics (RBD)
  • Fluid Simulation (FLIP)
  • Pyro Simulation

This was my first “official” work day for 2021 as I wrote on my Instagram-Account (https://www.instagram.com/pixeltrain3d):

Preparing my next Houdini FX classes for my SAE Students in the following weeks. After starting last year with the fundamentals with them, we now dive into Particles, Vellum, RBDs, Fluids and Pyro. Exciting weeks with a fully motivated group. Such fun besides my normal studio trainings to teach a student group again. Thanks to SAE Institute Germany for your trust.

If you want to start learning Houdini FX NOW, please check out my VideoOnDemand-Tutorial Series >>

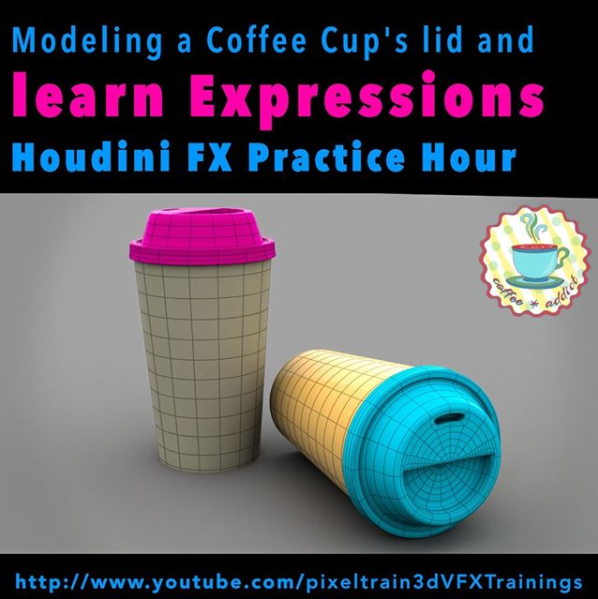
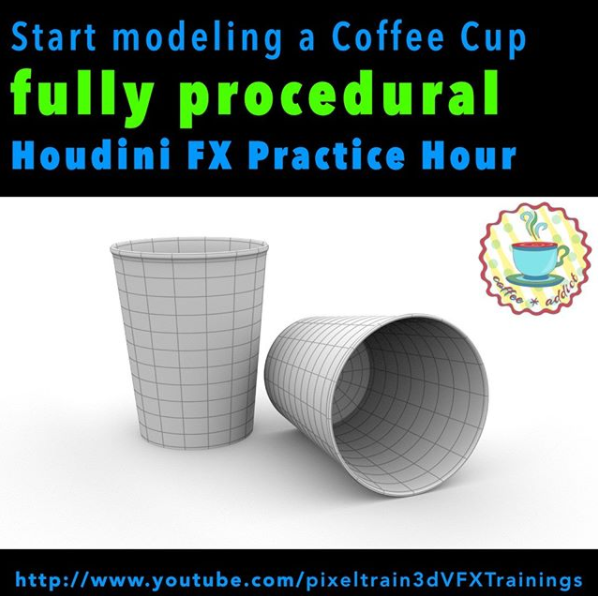
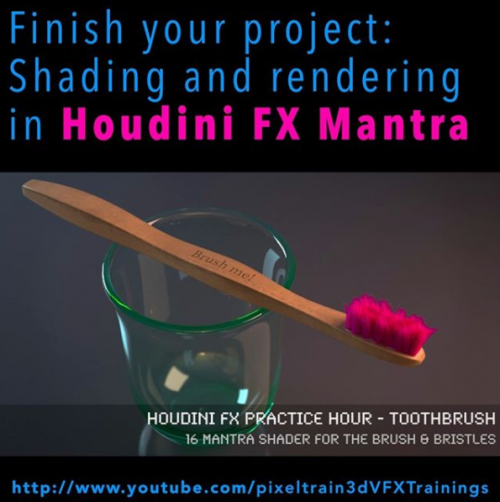
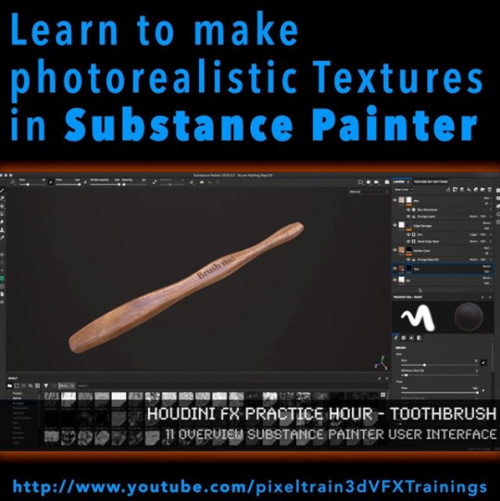
If you have any question concerning your learning path in becoming a Houdini FX Artist, please do not hesitate to ask me (info (at) hmaus.de) or just hop to my YouTube-Channel and start with one of my FREE Tutorial-Series “Houdini FX Practice Hour”:

https://www.youtube.com/pixeltrain3DVFXTrainings


If you like Helge’s Tutorials, give him some support to go on!

If you want to support Helge Maus for publishing more free tutorials, you can join his Patreons:
https://www.patreon.com/pixeltrain3d

Or if you want to buy him a coffee or pizza, here’s his Tip Jar:
https://www.paypal.com/donate/?hosted_button_id=72PHXB852BW5A

Thanks for your support!


Find more information on www.pixeltrain.de

YouTube: https://www.youtube.com/pixeltrain3DVFXTrainings

VIMEO: vimeo.com/pixeltrain

Patreon: https://www.patreon.com/pixeltrain3d

LinkedIn: linkedin.com/in/pixeltrain

Artstation: https://www.artstation.com/pixeltrain

Instagram: https://www.instagram.com/pixeltrain3d/

Twitter: https://twitter.com/pixeltrain

First “official” work day for 2021: Preparing my next Houdini FX classes for my SAE Students in the following weeks.

After starting last year with the fundamentals with them, we now dive into Particles, Vellum, RBDs, Fluids and Pyro. Exciting weeks with a fully motivated group. Such fun besides my normal studio trainings to teach a student group again.

Thanks to SAE Institute Germany for your trust!


If you like Helge’s Tutorials, give him some support to go on!

If you want to support Helge Maus for publishing more free tutorials, you can join his Patreons:
https://www.patreon.com/pixeltrain3d

Or if you want to buy me a coffee or pizza, here’s my Tip Jar:
https://www.paypal.com/donate/?hosted_button_id=72PHXB852BW5A

Thanks for your support!


Find more information on www.pixeltrain.net

YouTube: https://www.youtube.com/pixeltrain3DVFXTrainings

VIMEO: vimeo.com/pixeltrain

LinkedIn: linkedin.com/in/pixeltrain

Artstation: https://www.artstation.com/pixeltrain

Instagram: https://www.instagram.com/pixeltrain3d/

Facebook: https://www.facebook.com/helge.maus

Twitter: https://twitter.com/pixeltrain

Hello Houdini Beginners,

The first module of my free “Houdini FX Practice Hour” project “CoffeeCup” is finished!

Over the course of 13 lessons, you will learn the basics of the Houdini Polygon Modeling tools and how to get into a procedural approach with selections, groups and a little bit of HScript.


You will learn how to work with UVs and build a workflow between Houdini and Substance Painter.

We will render our scenes in Mantra.

In two bonus lessons, we dive deeper into the Classic Material Workflow between Houdini and Substance Painter 2020 and the new UDIM based workflow.

I hope, some of you find this useful.

Here is the full playlist:
https://www.youtube.com/playlist?list=PLp90cx0wSyKadoPBBcMQCSwtTAMBtXPIM

These lessons are meant as an addition to the other two Houdini Practice Hour projects (Banana and Toothbrush), so if you want to follow the complete learning path, you should begin with these. 


Have fun!

Helge

If you want to support me for publishing more free tutorials, you could join my Patreons: https://www.patreon.com/pixeltrain3d

Or you can download the Project files on Gumroad: https://gumroad.com/pixeltrain3d

This tutorial series „Houdini Practice Hour“ is meant for newbies in Houdini FX, who want to learn the basic tasks of modeling, uvs, shading, lighting and rendering on a project base in Houdini FX. I will explain you step by step the workflows and tools, so you can follow along and then experiment to deepen your knowledge. Learning means „getting your hands dirty“. This series doesn’t give you the most effective, elegant or the “only right way”, it’s concepted to give you a solid learning experience.

If your are searching for a complete introduction into the fundamentals of Houdini FX, you can take a look here: https://vimeo.com/ondemand/houdinifxfundamentals

Link to the YouTube-Playlist “Houdini FX Practice Hour”:
https://www.youtube.com/playlist?list=PLp90cx0wSyKZ2Nxnyp4W-EeaEQBp53k-f

If you have questions or topics, which should be added, please let us know.

Find more information on pixeltrain.de YouTube: https://www.youtube.com/pixeltrain3DVFXTrainings

VIMEO: https://www.vimeo.com/pixeltrain

LinkedIn: https://www.linkedin.com/in/pixeltrain

Artstation: https://www.artstation.com/pixeltrain

Dear Houdini FX Enthusiasts,

What keeps you up in long nights sitting in front of your screen?

Right, Coffee 🙂 Today, I have finished the first 4 hours module of my new free “Houdini FX Practice Hour” project “Coffee Cup”.

My focus this time was showing you the first steps in approaching procedural Polygon Modeling in Houdini FX. We talk about groups, channel referencing and we write some snippets of HScript. We also talk about different UV Tools inside of Houdini and look into the exchange workflow of the Model with external Painting Applications like Substance Painter, 3D-Coat and Mari. Yes, I also show how to layout UVs in a UDIM workflow. At the end of this first module, we build a Mantra Rendering scene and use the painted textures. I will release some bonus lessons about the Painting process in Substance Painter and 3D Coat, using UDIMs next week, so please have some patience.

YouTube: https://www.youtube.com/pixeltrain3DVFXTrainings

These lessons are beginners level and are building on the other two finished Houdini Practice Hour Projects “Banana” and “Toothbrush”.
I hope, you find them useful and have some fun.

Kind regards,
Helge

In this tutorial, you will learn how to unwrap the coffee cup and the lid with different UV nodes inside of Houdini FX.

We will take a look in the powerful UV Flatten node, but also UV Project and UV Unwrap.

Then we talk about layouting your UVs and I show you how to work with UDIMs.

These topics are covered:

  • UV Flatten Node
  • Cut Seams Tool
  • Making Cuts & Loop Cuts
  • Sew Tool
  • Visibility Node
  • Finding UV Distortions & UV Overlaps
  • Unwrapping the Cup
  • UV Project Node UV
  • Unwrap Node
  • Unwrapping sequentially
  • Pre-Selecting areas with Groups & expressions
  • Preserving existing seams
  • UV Layout Node
  • Layouting the islands
  • Layout with UDIMs

If you want to support me for publishing more free tutorials, you could join my Patreons: https://www.patreon.com/pixeltrain3d

Or you can download the Project files on Gumroad: https://gumroad.com/pixeltrain3d

This tutorial series „Houdini Practice Hour“ is meant for newbies in Houdini FX, who want to learn the basic tasks of modeling, uvs, shading, lighting and rendering on a project base in Houdini FX.

I will explain you step by step the workflows and tools, so you can follow along and then experiment to deepen your knowledge.

Learning means „getting your hands dirty“. This series doesn’t give you the most effective, elegant or the “only right way”, it’s concepted to give you a solid learning experience.

If your are searching for a complete introduction into the fundamentals of Houdini FX, you can take a look here: https://vimeo.com/ondemand/houdinifxfundamentals

Link to the YouTube-Playlist “Houdini FX Practice Hour”:
https://www.youtube.com/playlist?list=PLp90cx0wSyKZ2Nxnyp4W-EeaEQBp53k-f

If you have questions or topics, which should be added, please let us know.

Find more information on pixeltrain.de YouTube: https://www.youtube.com/pixeltrain3DVFXTrainings

VIMEO: https://www.vimeo.com/pixeltrain

LinkedIn: https://www.linkedin.com/in/pixeltrain

Artstation: https://www.artstation.com/pixeltrain

This time I talked too much and so our “Houdini FX Practice Hour” tutorials are a little bit late. But, I think you will like them. 3 new lessons …

This time we finish the lid of our coffee cup – again with procedural Polygon Modeling – and you will learn a little bit more Houdini HScript expressions as helpers. Also you will see how to make your own Houdini shelf, add a node presets …

Ok, enough, here is the link to my YouTube:

https://www.youtube.com/pixeltrain3DVFXTrainings

See you next week and if you like the content, please LIKE and SUBSCRIBE 😉

In this tutorial, you will learn the conceptional differences when working in a direct or procedural modeling approach.

Also, we discuss, how you branch out in larger trees to add more details and use channel expressions, again.

These topics are covered:

  • Direct Modeling vs Procedural Modeling
  • Discussion, why to use boolean sops as helpers
  • Fast ways to set flags in large node trees
  • Branching out for cup lid
  • PolyExpand2D Node
  • Using Channel References
  • Finishing the top of the lid

Playlist: Learn Houdini VFX with Helge Maus / pixeltrain

This tutorial series „Houdini Practice Hour“ is meant for newbies in Houdini FX, who want to learn the basic tasks of modeling, uvs, shading, lighting and rendering on a project base in Houdini FX.

I will explain you step by step the workflows and tools, so you can follow along and then experiment to deepen your knowledge. Learning means „getting your hands dirty“. This series doesn’t give you the most effective, elegant or the “only right way”, it’s concepted to give you a solid learning experience.

If you are searching for a complete introduction into the fundamentals of Houdini FX, you can take a look here:

https://vimeo.com/ondemand/houdinifxfundamentals

Helge Maus teaches 3D- & VFX Applications for 20 years. His focus lies on VFX, but he also works with many studios and agencies from different visualization areas. If you have questions or topics, which should be added, please let us know.

If you want to support me for publishing more free tutorials, you could join my Patreons: https://www.patreon.com/pixeltrain3d

Or you can download the Project files on Gumroad: https://gumroad.com/pixeltrain3d

If you have questions or topics, which should be added, please let us know.

Find more information on pixeltrain.de YouTube: https://www.youtube.com/pixeltrain3DVFXTrainings

VIMEO: https://www.vimeo.com/pixeltrain

LinkedIn: https://www.linkedin.com/in/pixeltrain

Artstation: https://www.artstation.com/pixeltrain

Ok, Friday is release day and the next “Houdini FX Practice Hour” project has started. We will start this week building a Coffee Cup Scene with some beans flying around. Also, we will dive into “procedural” Polygon Modeling in Houdini FX and, later for the beans, into Retopo and Rigid Bodies.

So, for people coming from other 3D applications, you will find a whole bunch of important Houdini FX concepts like selection, groups, automatically generated groups and channel expressions with HScript. Everything step-by-step, so that you can build your own scene.

Let’s start this week with fundamentals and build these paper cups – procedurally.

Thanks and have a nice weekend,

Helge

If you want to support me for publishing more free tutorials, you could join my Patreons: https://www.patreon.com/pixeltrain3d

Or you can download the Project files on Gumroad: https://gumroad.com/pixeltrain3d

In this tutorial, we will talk about the ideas of the Coffee Cups & Beans project, collect references with the help of PureRef and setting up our Houdini FX Project. It’s about learning how to start a new project.

These topics are covered:

  • Setting up a new Houdini Project
  • Understanding $JOB & relative paths
  • Importance of References
  • Using PureRef (https://www.pureref.com) to collect references
  • Moving & Resizing the PureRef Canvas
  • Finding the Key Bindings Re-arranging Boards
  • Entering Nodes /Text in PureRef Presenting Images
  • Adding Images to a PureRef Board
  • Optimize Boards
  • Exporting a PureRef Board as PNG
  • Loading Reference Images to Houdini FX

This tutorial series „Houdini Practice Hour“ is meant for newbies in Houdini FX, who want to learn the basic tasks of modeling, uvs, shading, lighting and rendering on a project base in Houdini FX. I will explain you step by step the workflows and tools, so you can follow along and then experiment to deepen your knowledge. Learning means „getting your hands dirty“. This series doesn’t give you the most effective, elegant or the “only right way”, it’s concepted to give you a solid learning experience.

If your are searching for a complete introduction into the fundamentals of Houdini FX, you can take a look here: https://vimeo.com/ondemand/houdinifxfundamentals

Link to the YouTube-Playlist “Houdini FX Practice Hour”:
https://www.youtube.com/playlist?list=PLp90cx0wSyKbb3jldZ43aRyHv-IrMyjCJ

If you have questions or topics, which should be added, please let us know.

Find more information on pixeltrain.de YouTube: https://www.youtube.com/pixeltrain3DVFXTrainings

VIMEO: https://www.vimeo.com/pixeltrain

LinkedIn: https://www.linkedin.com/in/pixeltrain

Artstation: https://www.artstation.com/pixeltrain

It’s done – today I have finished the complete “Toothbrush” series of my “Houdini FX Practice Hour”.

16 FREE lessons, over 3 hours of training about Houdini FX, Grooming Hair, Substance Painter and Mantra Rendering.

Now I am planing the next project 🙂

YouTube: https://www.youtube.com/pixeltrain3DVFXTrainings

Thanks for subscribing and sharing!

If you want to support me for publishing more free tutorials, you could join my Patreons: https://www.patreon.com/pixeltrain3d

Or you can download the Project files on Gumroad: https://gumroad.com/pixeltrain3d

Link to the YouTube-Playlist “Houdini FX Practice Hour”:
https://www.youtube.com/playlist?list=PLp90cx0wSyKZ2Nxnyp4W-EeaEQBp53k-f

If your are searching for a complete introduction into the fundamentals of Houdini FX, you can take a look here: https://vimeo.com/ondemand/houdinifxfundamentals

In this tutorial, we will finish our project by adding Mantra Shaders for the Brushes and the Bristles.

You will learn to add the external textures from Substance Painter and how to get the right look.

Also, we talk about subnets and how to pack the whole brush into a subnet as a preparation for a later HDA workflow.

These topics are covered:

  • Making the Bristles setup moveable
  • Working with Subnets
  • Re-caching Guide Groom data
  • Principled Shader
  • Adding Textures (from Substance Painter)
  • Normal Maps
  • Base Color, Metallic, Roughness Maps
  • Houdini Hair Shader for the Bristles
  • Changing the Hair
  • Generation to SOP Working with the tree view
  • Rendering the final image

This tutorial series „Houdini Practice Hour“ is meant for newbies in Houdini FX, who want to learn the basic tasks of modeling, uvs, shading, lighting and rendering on a project base in Houdini FX. I will explain you step by step the workflows and tools, so you can follow along and then experiment to deepen your knowledge. Learning means „getting your hands dirty“. This series doesn’t give you the most effective, elegant or the “only right way”, it’s concepted to give you a solid learning experience.

If your are searching for a complete introduction into the fundamentals of Houdini FX, you can take a look here: https://vimeo.com/ondemand/houdinifxfundamentals

If you have questions or topics, which should be added, please let us know.

Find more information on pixeltrain.de YouTube: https://www.youtube.com/pixeltrain3DVFXTrainings

VIMEO: https://www.vimeo.com/pixeltrain

LinkedIn: https://www.linkedin.com/in/pixeltrain

Artstation: https://www.artstation.com/pixeltrain

The next hour of free content is online. This time we dive into Substance Painter and texture our Toothbrush from the “Houdini FX Practice Hour”. Next week we will finish this project by rendering the final scene in Houdini FX with Mantra and Pixar’s RenderMan. And, the next project is coming soon!

These tutorials are meant for newbies in Painter but are filled with many tips & trick and workflow hints.
I hope, you have fun with them.
Helge

If you want to support me for publishing more free tutorials, you could join my Patreons: https://www.patreon.com/pixeltrain3d

Or you can download the PROJECT FILES on Gumroad: https://gumroad.com/pixeltrain3d

If your are searching for a complete introduction into the fundamentals of Houdini FX, you can take a look here: https://vimeo.com/ondemand/houdinifxfundamentals

In this tutorial, you will have a brief introduction into the User Interface of Substance Painter and its paradigms. Then we will dive into the Baker and use our High-Poly Mesh from Houdini FX to bake out the needed maps for Painting.

Also, we talk about the feature-set of Painter at the moment and how to fix baking problems.

These topics are covered:

  • Checking the export setting in Houdini FX for low & high poly meshes
  • Creating a new Substance Painter project
  • Understanding the Project Settings
  • Texture Resolution, Normals, UDIMs
  • Navigation in Substance Painter
  • Quick UI overview
  • Painting with Material
  • Why do we need baked maps?
  • Substance Painter Baker
  • Understanding the baking process
  • Baking of Maps
  • Fixing baking problems
  • Inspecting Channels & Maps

This tutorial series „Houdini Practice Hour“ is meant for newbies in Houdini FX, who want to learn the basic tasks of modeling, uvs, shading, lighting and rendering on a project base in Houdini FX.

I will explain you step by step the workflows and tools, so you can follow along and then experiment to deepen your knowledge.

Learning means „getting your hands dirty“. This series doesn’t give you the most effective, elegant or the “only right way”, it’s concepted to give you a solid learning experience.

List of Tutorials:

Toothbrush – 10 Baking Maps in Substance Painter
https://youtu.be/Wy9yJs6Wghg

Toothbrush – 11 Overview Substance Painter User Interface
https://youtu.be/3f4KGNfto8w

Toothbrush – 12 Adding & Projecting the wooden base
https://youtu.be/Wnl1ge8RtCc

Toothbrush – 13 Building a Painting Layer Stack
https://youtu.be/jaeRdR4riAM

Toothbrush – 14 Projecting Text & Exporting Textures
https://youtu.be/8LyKz6USbZ4

Link to the YouTube-Playlist “Houdini FX Practice Hour”:
https://www.youtube.com/playlist?list=PLp90cx0wSyKZ2Nxnyp4W-EeaEQBp53k-f

If you have questions or topics, which should be added, please let us know.

Find more information on pixeltrain.de YouTube: https://www.youtube.com/pixeltrain3DVFXTrainings

VIMEO: https://www.vimeo.com/pixeltrain

LinkedIn: https://www.linkedin.com/in/pixeltrain

Artstation: https://www.artstation.com/pixeltrain

Here we go – the next 4 lessons of our “Houdini FX Practice Hour” (Beginner’s series) are online. Hairy stuff, this time!

The toothbrushes get now their bristles with the help of the Houdini FX Grooming system. Thanks for all your support!

In this tutorial, you will learn how the Houdini FX Grooming system works and which nodes are involved to build up an easy system.

We will take a look into generating Guides and how to generate Hair from them.

Also you will learn how to use Attribute Paint to drive the placement and length of your Hair.

These topics are covered:

  • Pros and cons on shelf tools
  • Adding a Fur System
  • Guide Groom Node
  • Explanation Parameters in the Guide Groom Node
  • Working with Overrides
  • Skin Attributes
  • Painting Guide / Hair Length (lengthscale) with Attribute Paint
  • Hair Generate Node
  • Explanation Hair Generate Node Parameters
  • The connection between Guides and Hair
  • Mantra Hair Generation
  • Generating Splines for third party Renderers

This tutorial series „Houdini Practice Hour“ is meant for newbies in Houdini FX, who want to learn the basic tasks of modeling, uvs, shading, lighting and rendering on a project base in Houdini FX.

I will explain you step by step the workflows and tools, so you can follow along and then experiment to deepen your knowledge.

Learning means „getting your hands dirty“. This series doesn’t give you the most effective, elegant or the “only right way”, it’s concepted to give you a solid learning experience.

Link to the YouTube-Playlist “Houdini FX Practice Hour”: https://www.youtube.com/playlist?list=PLp90cx0wSyKZ2Nxnyp4W-EeaEQBp53k-f

If you have questions or topics, which should be added, please let us know.

If you want to support Helge Maus for publishing more free tutorials you could join his Patreons: https://www.patreon.com/pixeltrain3d

Or you can download the Project files on Gumroad: https://gumroad.com/pixeltrain3d

Find more information on pixeltrain.de YouTube: https://www.youtube.com/pixeltrain3DVFXTrainings

VIMEO: https://www.vimeo.com/pixeltrain

LinkedIn: https://www.linkedin.com/in/pixeltrain

Artstation: https://www.artstation.com/pixeltrain

Welcome to our new “Houdini FX Practice Hour” project.

This time we will model, texture and render a Toothbrush with glass.

Also, we will dive into the Houdini FX groom system for generating the bristles with hair.

Hope, you like it – if yes, please subscribe 🙂

In this tutorial, we will create a Houdini FX project and talk about the importance of the project structure and the Houdini variables $JOB and $HOME and to make sure, that your paths will not break when transferring the project to another machine or a render farm.

These topics are covered:

  • Generation a new Houdini FX project
  • Getting out of a stuck dialog box
  • The importance of $JOB and $HOME
  • Aliases and Variables dialog
  • Making sure your paths are always correct
  • Switching and activating a project
  • Adding reference images to the structure

This tutorial series „Houdini Practice Hour“ is meant for newbies in Houdini FX, who want to learn the basic tasks of modeling, uvs, shading, lighting and rendering on a project base in Houdini FX.

I will explain you step by step the workflows and tools, so you can follow along and then experiment for deepen your knowledge. Learning means „getting your hands dirty“.

This series doesn’t give you the most effective, elegant or the “only right way”, it’s concepted to give you a solid learning experience.

If your are searching for a complete introduction into the fundamentals of Houdini FX, you can take a look here: https://vimeo.com/ondemand/houdinifxfundamentals

If you have questions or topics, which should be added, please let us know.

If you want to support Helge Maus for publishing more free tutorials you could join his Patreons: https://www.patreon.com/pixeltrain3d

Or you can download the Project files on Gumroad: https://gumroad.com/pixeltrain3d

Find more information on pixeltrain.de YouTube: https://www.youtube.com/pixeltrain3DVFXTrainings

VIMEO: https://www.vimeo.com/pixeltrain

LinkedIn: https://www.linkedin.com/in/pixeltrain

Artstation: https://www.artstation.com/pixeltrain