Fusion for Production - VFX Compositing with Fusion - 05 Fundamentals of Masks in Fusion

After a longer pause I’ve released a new free tutorial on my YouTube channel. I hope you like it 🙂

👉 https://youtu.be/RTIdh-ZsbTo

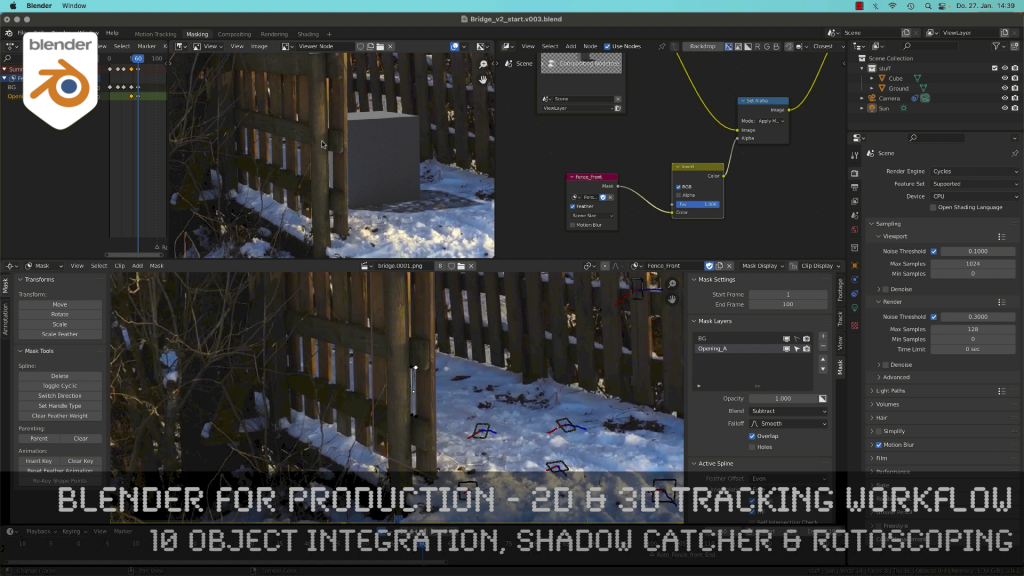
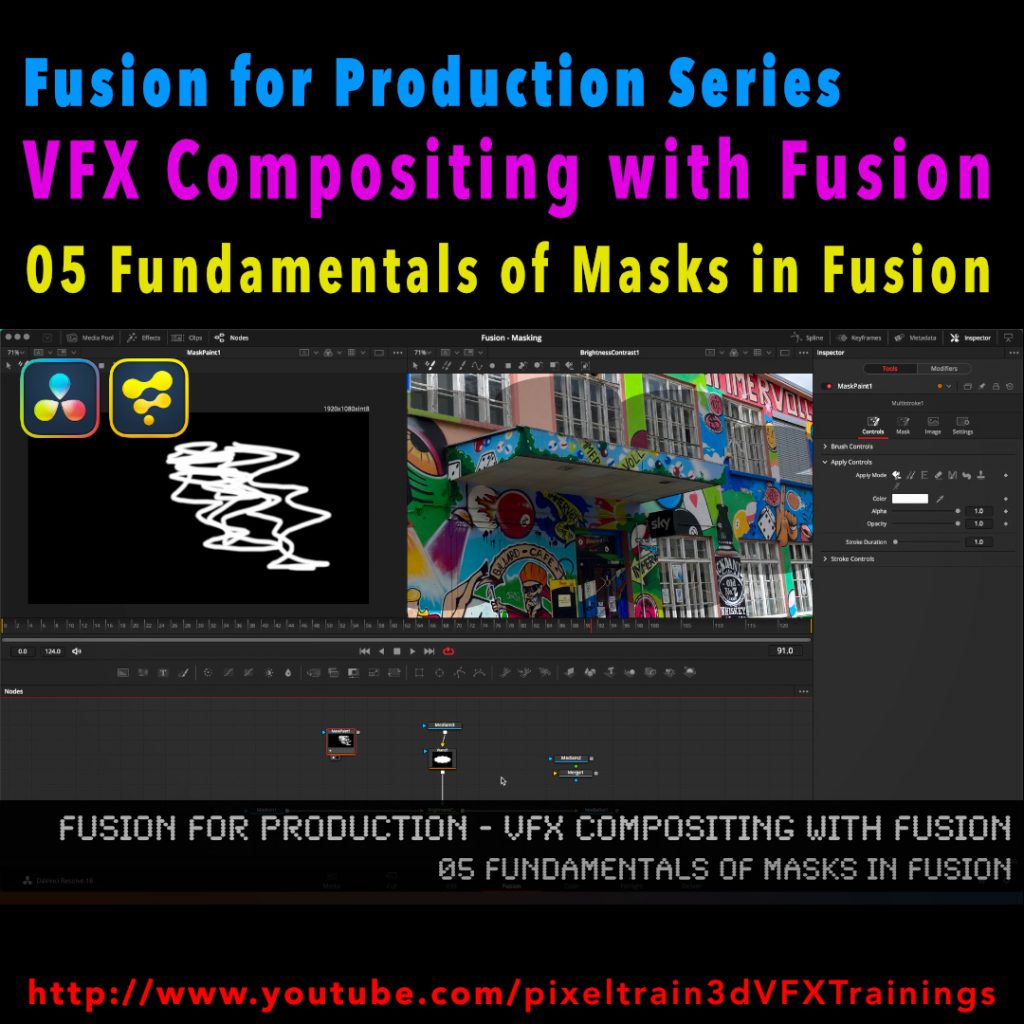
In this tutorial, you will learn the general uses and workflows of Masks in Fusion / Fusion Page in Resolve.

You will learn the different Mask types in Fusion, the most important parameters and options when drawing them. Also we will look into how to combine Masks for complex shapes for Rotoscoping. And, we will talk about bitmap based Masks in Fusion and how to use the Magic Mask, the Bitmap Mask and the Paint Mask.

I hope you like this new tutorial.

If you have questions or topics, which should be added, please let me know.

If you want to support me for publishing more free tutorials you could join my Patreons:

👉 https://www.patreon.com/pixeltrain3d

or give me a fast Coffee time Tip:
👉 PayPal: https://paypal.me/pixeltrain

Learn the Fundamentals of the Merge tool & the almighty Channel Booleans tool in Fusion Studio.

Here is the Link to the tutorial and the whole series. VFX Compositing Techniques with Merge & Channel Booleans in Fusion Studio.

Fusion for Production - VFX Compositing with Fusion - 02b Fusion Compositing inside DaVinci Resolve

Here is the second part of last weeks tutorial. In this second part of lesson two, we will examine how to work with Fusion inside of DaVinci Resolve. I will show you different ways of making Fusion composites, some on the timeline, but also independent from the timeline. Also, you will learn how to have several versions on Fusion comps on a Timeline Clip for making variants or versions of your work.

Then we will discuss and solve some of the most asked problems when working with Fusion inside of the DaVinci Resolve Environment, for example how to import EXR and PNG sequences from Blender and other DCCs, how and when to use MediaIn Nodes correctly, how to add Loaders and Savers to your toolbar, how to split EXRs in severals Loaders with the Hos_SplitEXR script and how to get your Linear EXRs correctly into the Viewer. 

Also, we talk very briefly about ColorManagement for VFX assets in DaVinci Resolve and where to find the Resolve FX OFX plugins, which you can directly use inside of Fusion in the DaVinci Resolve Environment.

It’s quite a long tutorial, but I believe that it gives you everything you have to know if your want to start comping with Fusion inside of DaVinci Resolve and helps you around the common pitfalls.

If you have questions or topics, which should be added, please let me know.

If you want to support me for publishing more free tutorials you could join my Patreons:

Become a Patron!

or give me a fast Coffee time tip:
PayPal: https://paypal.me/pixeltrain

Have fun!

Fusion for Production - VFX Compositing with Fusion - 02a Fusion Studio vs DaVinci Resolve Workflow

In this tutorial series, we will talk about Blackmagic Fusion Studio and Blackmagic DaVinci Resolve (Fusion page) as a professional VFX Compositing package. We will dive into basic workflows and techniques to make your daily compositing work more effective and fun.

We start this tutorial by discussing the differences between using Fusion inside of the free version of DaVinci Resolve to the paid version of Fusion Studio and DaVinci Resolve Studio. I give you a list of features, what you get in the paid versions and why they are so useful in production. Also we talk about the differences in working in Fusion Studio vs the Fusion Page in DaVinci Resolve and when which of these workflows are more useful.

After that we will dive into Fusion Studio to learn about basic Fusion concepts, beginning with the User Interface, Node Trees, Tools and a first composite from Loader to the Saver for the final output. This should help you to understand Fusion as a node-based compositor and helps you in understanding the more advanced workflows in the second part of this lesson, which will then dive into Fusion Compositing inside of the DaVinci Resolve Environment.

These topics are covered in this tutorial:

00:00 Overview of the series

00:28 Topics list for lesson 02, part 01 & part 02

03:45 DaVinci Resolve / Fusion Studio free vs. Paid

08:34 Fusion Studio UI Overview

10:36 Compositing Settings / Global Settings

11:36 Frame Format, Frame Rate fps and Color Depth

12:53 Adding Nodes & Tools

14:05 Loading footage

14:22 Preview options in the Loader tool

15:21 Working with the Fusion Viewer

16:23 Adjusting the compositing length

17:09 Preview area in the timeline

17:35 Caching the timeline

18:20 Loading additional logos

19:07 Adding a text tool

19:24 Adding a sequential node

20:04 Arrange tools in the node graph

20:23 Merge Node and Transformations

20:35 Auto Proxy option in the Viewer

21:00 Faster ways of merging Nodes

21:53 Outputting a compositing with a Saver

22:47 Output Settings

23:08 Color Depth Settings for Source Nodes

24:16 Loader Setting for the import

25:06 Starting a Render Job

25:49 Importing an EXR sequence

27:20 Viewer options for transparencies

28:22 Setting a Viewer Gamma 2.2

29:09 Changing the Gamma in the Fusion View LUT

29:54 Using the Stefan Ihringer Viewer LUTS from Reactor

30:31 Setting the Preview Range

30:39 Importance of right mouse button on ui elements

31:15 Working with Audio in Fusion Studio 

32:14 Overview over the next part of Lesson 02b

As a Senior 3D & VFX Trainer, Helge Maus teaches 3D- & VFX Applications for 20 years. His focus lies on VFX, but he also works with many studios and agencies from different visualization areas. He focuses on Houdini FX, Blender, and NUKE for his daily work and training.

If you have questions or topics, which should be added, please let me know.

If you want to support me for publishing more free tutorials you could join my Patreons:

Become a Patron!

or give me a fast Coffee time tip:
PayPal: https://paypal.me/pixeltrain

Find more information on www.pixeltrain.net

YouTube: https://www.youtube.com/pixeltrain3DVFXTrainings
Twitter: https://twitter.com/pixeltrain
Blog: http://www.helgemaus.com
Mastodon: https://mastodon.art/web/@pixeltrain3d
Instagram: https://www.instagram.com/pixeltrain3d/
LinkedIn: https://www.linkedin.com/in/pixeltrain/
Artstation: https://www.artstation.com/pixeltrain

Fusion for Production - VFX Compositing with Fusion - 01 Installation of Reactor in Fusion & Resolve

In this tutorial series, we will talk about Blackmagic Fusion Studio and Blackmagic DaVinci Resolve (Fusion page) as a professional VFX Compositing package. We will dive into basic workflows and techniques to make your daily compositing work more effective and fun.

This tutorial shows you how to install the free Reactor Package Manager in Blackmagic Fusion Studio and Blackmagic DaVinci Resolve and how to use it. We will install Cryptomatte, Viewershaders and the Split EXR Script for working with EXR sequences inside of Fusion and DaVinci Resolve. Also you find here hundreds of free extensions and plugins for your Fusion, helping you with VFX compositing and Motiongraphics.

These topics are covered in this tutorial:

00:00 Overview of the series
01:02 Why do you want to use Fusion as a compositor?
01:10 Fusion in comparison with Foundry NUKE
03:19 How to extend the Fusions Toolset
04:03 Reactor for Fusion and Resolve
04:55 Installing the Reactor Lua Script in Fusion Studio
06:19 Overview of the Reactor User Interface
07:28 Installing new Tools, for example, Cryptomatte for Fusion
08:58 Installing the Split EXR Script
09:30 FUI Toolset
09:44 Installing Viewer Shaders for Linear Workflow
10:24 Reactor Menu in Fusion Studio
11:02 Finding the new Tools, Scripts and ViewerLUTs
13:00 Installing the Reactor Lua Script in DaVinci Resolve
13:52 Install Cryptomatte, ViewShaders & Resolve Essentials in DaVinci Resolve
14:49 Generating a new Fusion Comp in Resolve
15:57 Finding the Reactor Window in DaVinci Resolve
16:30 Using the HoS EXR Split Script for EXR Sequences in DaVinci Resolve

As a Senior 3D & VFX Trainer, Helge Maus teaches 3D- & VFX Applications for 20 years. His focus lies on VFX, but he also works with many studios and agencies from different visualization areas. He focuses on Houdini FX, Blender, and NUKE for his daily work and training.

If you have questions or topics, which should be added, please let me know.

If you want to support me for publishing more free tutorials you could join my Patreons:

Become a Patron!

or give me a fast Coffee time tip:
PayPal: https://paypal.me/pixeltrain

Find more information on https://www.pixeltrain.net
YouTube: https://www.youtube.com/pixeltrain3DVFXTrainings
Twitter: https://twitter.com/pixeltrain
Instagram: https://www.instagram.com/pixeltrain3d/
LinkedIn: https://www.linkedin.com/in/pixeltrain/
Artstation: https://www.artstation.com/pixeltrain

Blender 3.0 for Production - 2D & 3D Tracking Workflow - 10 Object Integration, Shadow Catcher & Rotoscoping

Today, I’ve just published my next Blender 3.0 tutorial.
We talk about 3D-Object Integration, Shadow Catchers & Rotoscoping in Blender 3.1 after 3D-Tracking. It’s part of my free “Blender for Production” series. Have fun!

Blender 3.0 for Production - 2D & 3D Tracking Workflow - 06 Plane-Tracking, Corner Pin & Compositing

My next free “Blender 3.0 for Production” tutorial is out.
Let’s talk about plane-tracking, corner pining and the integration with the built-in compositor.

Have fun!

This tutorial is an answer to a pixeltrain Patreon question: It shows the roundtrip of a stabilized shot from Blender’s Tracking system to NUKE (or any other Compositing package like Fusion or AfterEffects) and how to use Rotoscoping data from there back in Blender. If you want to join my Patreon community, you can find it here: https://www.patreon.com/pixeltrain3d

These topics are covered in this tutorial:

  • Writing out a stabilized shot as EXRs from Blender
  • NUKE project settings
  • Keying out the screen
  • Shuffle the Alpha into RGBA
  • Writing out data from NUKE
  • Importing the NUKE EXRs into the Blender compositor
  • Generating a Solid Color Plane
  • Inject an alpha to a plate
  • Comp the plates together
  • Understand stabilize and matchmove

If you want to use the same footage, here is my Gumroad link:

https://pixeltrain3d.gumroad.com/l/GEdjT

Be aware, that these files are included in my Patreon 😉

https://www.patreon.com/pixeltrain3d

This tutorial series „Blender for Production“ focuses on Blender as a full Production Suite for (Indie) 3D- & VFX Productions. In these tutorials, I will explain how to work with the different Modules of Blender and how they are connected. I will give you an introduction to the specific functionalities, but also the production context and workflows, which can help you to use Blender in your productions. 

As a Senior 3D & VFX Trainer, Helge Maus teaches 3D- & VFX Applications for 20 years. His focus lies on VFX, but he also works with many studios and agencies from different visualization areas. He focuses on Houdini FX, Blender, and NUKE for his daily work and training.

If you have questions or topics, which should be added, please let me know.

If you want to support Helge Maus for publishing more free tutorials you could join his Patreons:

https://www.patreon.com/pixeltrain3d

Find more information on http://www.pixeltrain.net
YouTube: https://www.youtube.com/pixeltrain3DVFXTrainings
Twitter: https://twitter.com/pixeltrain
Instagram: https://www.instagram.com/pixeltrain3d/
LinkedIn: https://www.linkedin.com/in/pixeltrain/
Artstation: https://www.artstation.com/pixeltrain

Thanks to the new USD export in Blender, the exchange between Blender’s powerful motion tracker and NUKE or Houdini is becoming easier and easier. Blender is becoming more and more team-minded – thanks to the developers.

My upcoming Blender free tutorial series offers a deep dive into camera and object tracking.

More information then on YouTube. Coming soon: https://www.youtube.com/pixeltrain3DVFXTrainings


If you like Helge’s Tutorials, give him some support to go on!

If you want to support Helge Maus for publishing more free tutorials, you can join his Patreons:
https://www.patreon.com/pixeltrain3d

Or if you want to buy me a coffee or pizza, here’s my Tip Jar:
https://www.paypal.com/donate/?hosted_button_id=72PHXB852BW5A

Thanks for your support!


Find more information on www.pixeltrain.net

YouTube: https://www.youtube.com/pixeltrain3DVFXTrainings

LinkedIn: linkedin.com/in/pixeltrain

Artstation: https://www.artstation.com/pixeltrain

Instagram: https://www.instagram.com/pixeltrain3d/

My new tutorial is out – Blender 3.0 to NUKE Workflow – 04 Cryptomatte Fix, CyclesX & Build Export Nodes Add-on

In this tutorial, we will talk about the changes in Blender 3.0 and NUKE 13.0v5 and fix the Cryptomatte problems some of you have been fighting with.

Also I go though the process of exporting Multilayer EXRs from Blender to NUKE again and show how to make EXR sequences for every pass separately.

Then I demonstrate you a fast Blender Add-on, which builds your export node trees in the Blender compositor automatically for you and how to generate a World Position Pass in Cycles X.

YouTube: https://www.youtube.com/pixeltrain3DVFXTrainings