Category: Free Video Tutorials
Freie Video-Tutorials und Auszüge aus meinen Publikationen.
Freie Video-Tutorials und Auszüge aus meinen Publikationen.
Hi folks,
At the moment I’m reworking the DaVinci Resolve & Fusion tutorials collection on my pixeltrain Patreon. So you now can watch all my tutorials there without YouTube’s advertising bombardment.
https://www.patreon.com/collection/533543
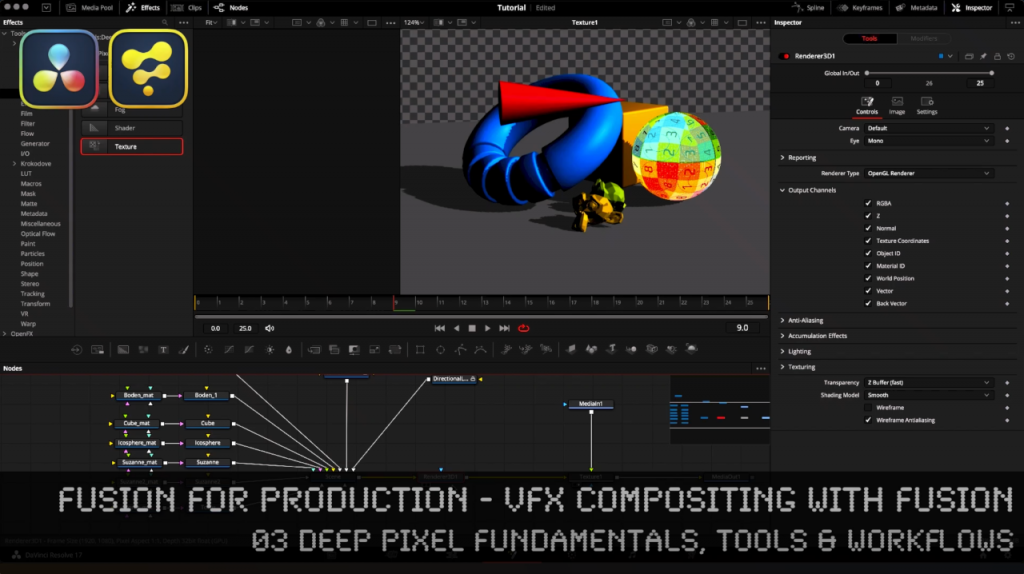
The introductory tutorials for BlackmagicDesign Fusion and Fusion in BlackmagicDesign DaVinci Resolve are now relinked and therefore available to all Patreons.
This software package is simply fantastic for anyone who wants to edit videos, composite animations and renderings, and create HUDs. I hope you enjoy it.
Let me know if you’d like to delve deeper into BlackmagicDesign Fusion.
Then we can plan more for the future.
Cheers,
Helge
I’ve released a new “Blender for Production” tutorial. Today I talk about ways to bookmark the Blender 3D view, generate cameras from the current view and how to animate camera switches easily.
Have fun!
Helge
P.S. You can also get this and many more Blender tutorials on my Patreon page:
https://www.patreon.com/pixeltrain3d
Just added a new lesson to my “Blender Fundamentals” publication about the changes in the Blender 4.2+ Auto Smooth / Normals workflow.
I also made this lesson free for everyone on my free Patreon here:
Have fun!
P.S. Keep in mind, it’s a lesson from a beginners publication 😉
I’m not sure if you all have seen it, but I started to upload all the tutorial videos of my “Blender Fundamentals” publication to my Patreon for the $5 tier. At the end it will be around 25 hours of content 😉
I plan for the future, that following publications about Blender and Godot will be published as a buyable product and as Patreon videos at the same time. The reason is, that I believe, that Patreons should have all my publication stuff for free as a “Thank you  ” for their support.
https://www.patreon.com/pixeltrain3d/posts
I also published more technical articles and news about Blender and Godot in the last weeks with the goal that you find my free Patreon also a good resource of industry news. And, most important, ad-free. I will invest even more time in that in the future.
Thank you all for your support, have a great day.
Helge
P.S. These tutorials can be found in the Collections Tab under “Blender Fast Forward”. Still many to upload in the next weeks  https://www.patreon.com/pixeltrain3d/collections
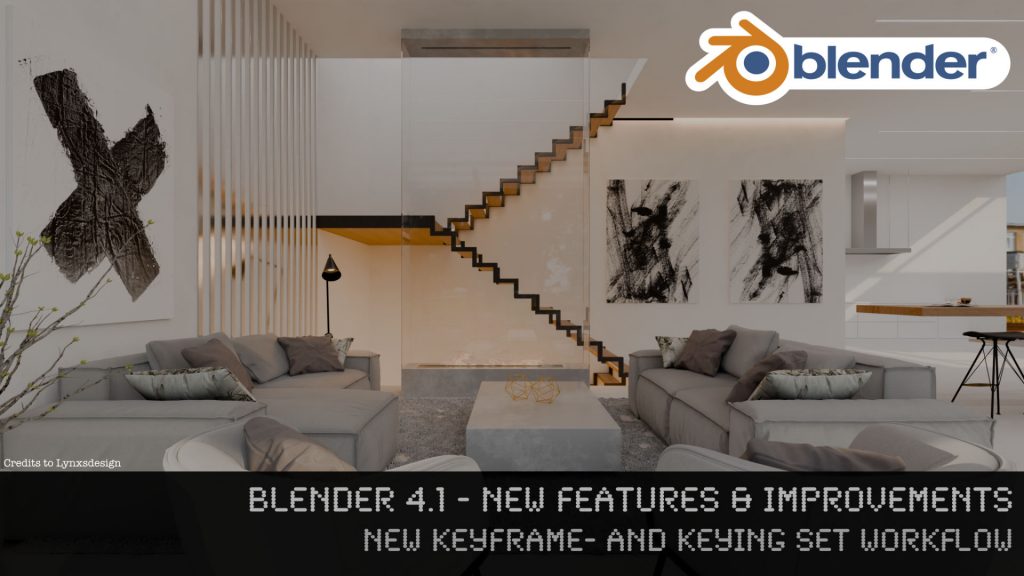
Just published a short Blender tutorial on YouTube. It’s about the changes and improvements of the keyframing workflow in Blender 4.1 .
This video was recorded some time ago for my Patreon page (👉 https://www.patreon.com/pixeltrain3d ) and thanks to my supporters it’s now also on YouTube:
👉 https://youtu.be/v9ZjkkUVVr8?si=2VgKLISXoMI44RSe
Have fun!
Helge
This series „Blender for Production“ focuses on Blender as a full Production Suite for (Indie) 3D- & VFX Productions. I will explain how to work with the different Modules of Blender and how they are connected.
Also, I will give you an introduction to the specific functionalities, but also the production context and workflows, which can help you to use Blender in your productions.
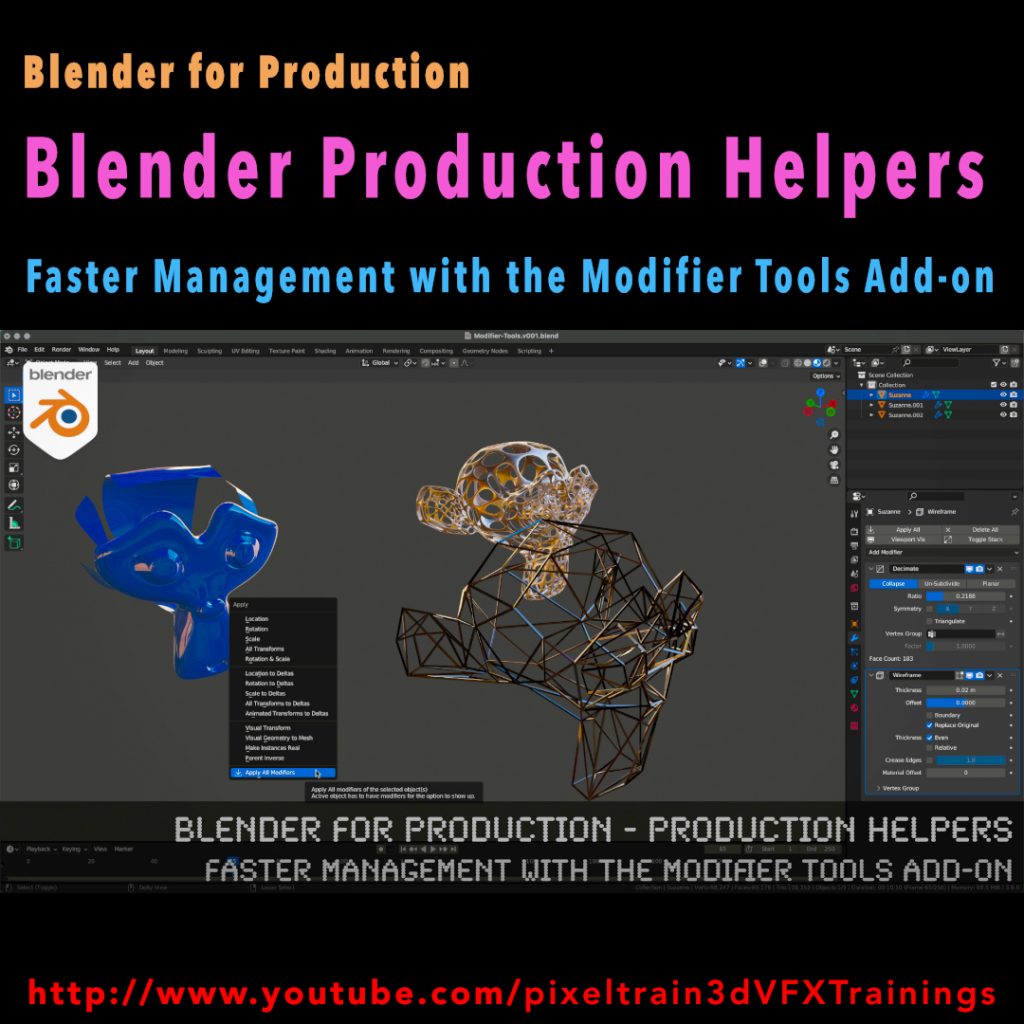
In this tutorial we will talk about the built-in Modifier Tools add-on, which helps you to manage larger modifier stacks on objects more elegant. We also look into some best practice workflows with and without this add-on, when it some to modifiers.
These topics are covered in this tutorial:
00:00 Overview of the tutorial
00:32 Modifiers in Blender Workflow
00:51 Tips for fast opening the modifier stack
01:12 Understanding Modifier Flags
02:23 See Modifier result in Edit Mode
03:00 Applying Modifiers correctly
03:33 Using the Apply Menu
04:19 Activate the Modifier Tools Add-on
04:51 UI of Modifier Tools
05:11 Explanation Toggle Stack and Tips
05:56 Drag activation of multiple Modifiers
06:56 Switching Viewport Visibility of a Modifier stack
07:20 Delete all Modifiers on an object
07:30 Working with multiple Modifier stacks at the same time
09:03 Apply the Modifier stack
09:49 Addition in the Apply Menu
10:14 Outro
As a Senior 3D & VFX Trainer, Helge Maus teaches 3D- & VFX Applications for over 20 years.
His focus lies on Generalist work for VFX and Games. He works with studios, agencies and freelancers from different visualization areas and from the games industry.
Meanwhile he focuses on Blender, Unity, Godot & Fusion for his daily work and training. His strong industry background in teaching Houdini FX, Nuke, and Maya over many years helps him to train artists from the industry within a wide production context.
If you have questions or topics, which should be added, please let me know.
If you want to support me for publishing more free tutorials you could join my Patreons:
https://www.patreon.com/pixeltrain3d
or give me a fast Coffee time Tip on
PayPal: https://paypal.me/pixeltrain
Find more information on www.pixeltrain.net
YouTube: https://www.youtube.com/pixeltrain3DVFXTrainings
Mastodon: https://mastodon.art/web/@pixeltrain3d
Instagram: https://www.instagram.com/pixeltrain3d/
LinkedIn: https://www.linkedin.com/in/pixeltrain/
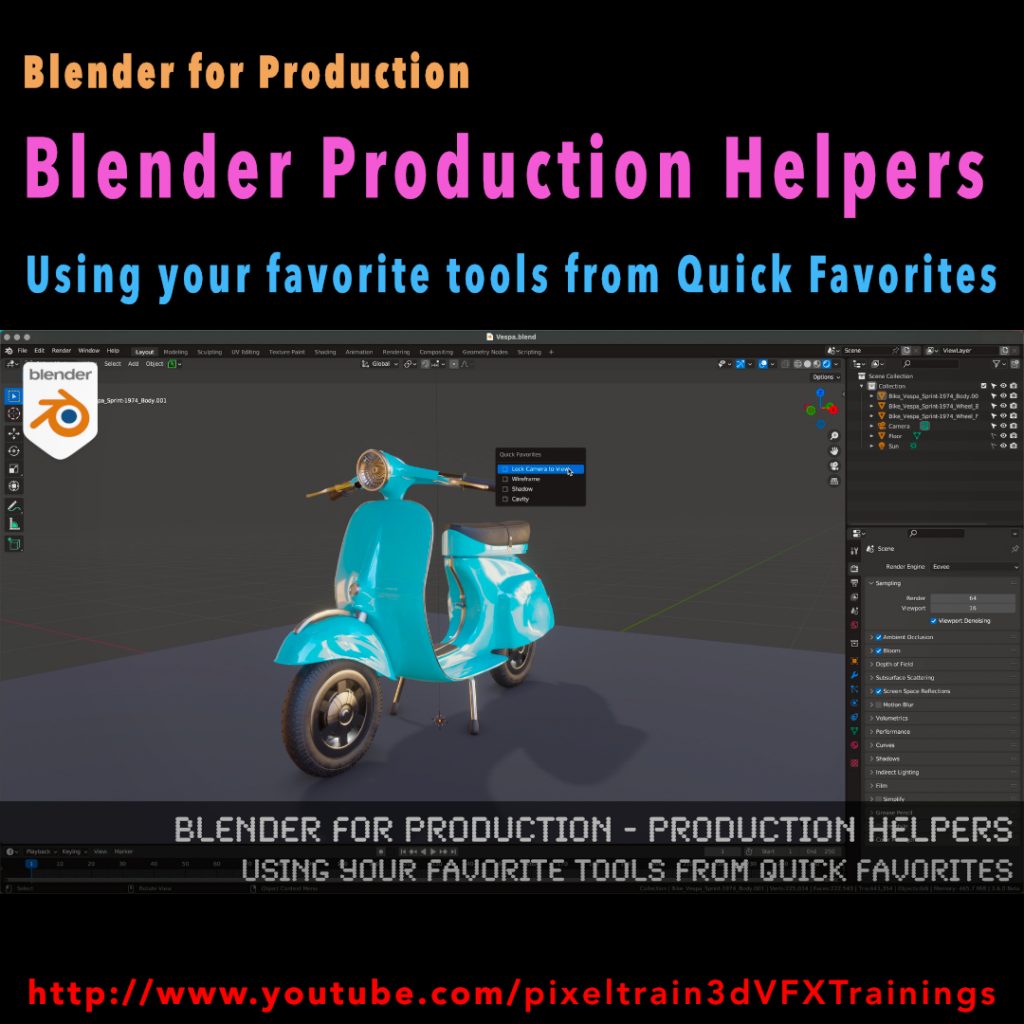
Published another free “Blender for Production” tutorial:
“Production Helpers – Using Your Favorite Tools from Quick Favorites”
👉 https://youtu.be/rdqAm_px-oI
In this tutorial we will talk about setting up a Quick Favorites menu for the different working modes inside of Blender. Often used functions and options can be added there by the artist to work faster and more efficient. While explaining the process we will look into several clever helpers like switching edit meshes with keyboard shortcuts, fading inactive objects, configure often used overlays and much more.
Have fun!
Helge
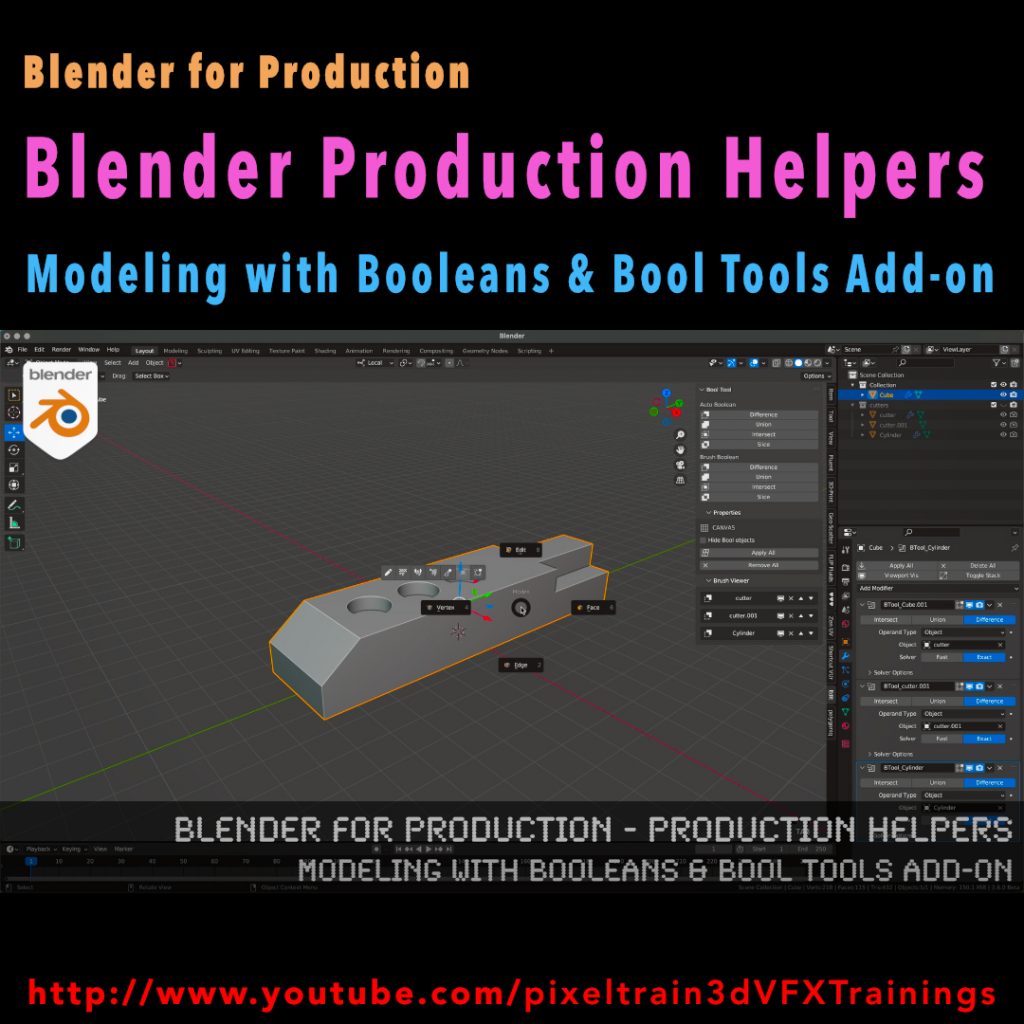
This series „Blender for Production“ focuses on Blender as a full Production Suite for (Indie) 3D- & VFX Productions.
I will explain how to work with the different Modules of Blender and how they are connected.
Also, I will give you an introduction to the specific functionalities, but also the production context and workflows, which can help you to use Blender in your productions.
In this tutorial we will talk about the basic principles of making hard surface models inside of Blender and how modifiers like booleans, solidify, array and mirror can help you with that. You will see the default Blender workflow and get a lot of workflow insights and tricks how to work with object visibilities, collections, and transformations. They are the basics for a procedural modeling approach for your models. Then we will see, how the free built-in Blender Bool Tools add-on can help you with this workflow to make less clicks and have a faster result.
As a Senior 3D & VFX Trainer, Helge Maus teaches 3D- & VFX Applications for 20 years. His focus lies on VFX, but he also works with many studios/ agencies from different visualization areas and clients from the games industry. He focuses on Blender, Unity, Fusion & Godot for his daily work and training. He has a strong industry background in teaching Houdini FX, Nuke, and Maya over many years.
If you have questions or topics, which should be added, please let me know.
If you want to support me for publishing more free tutorials you could join my Patreons:
https://www.patreon.com/pixeltrain3d
or give me a fast Coffee time Tip on
PayPal: https://paypal.me/pixeltrain
Find more information on www.pixeltrain.net
YouTube: https://www.youtube.com/pixeltrain3DVFXTrainings
Mastodon: https://mastodon.art/web/@pixeltrain3d
Instagram: https://www.instagram.com/pixeltrain3d/
LinkedIn: https://www.linkedin.com/in/pixeltrain/
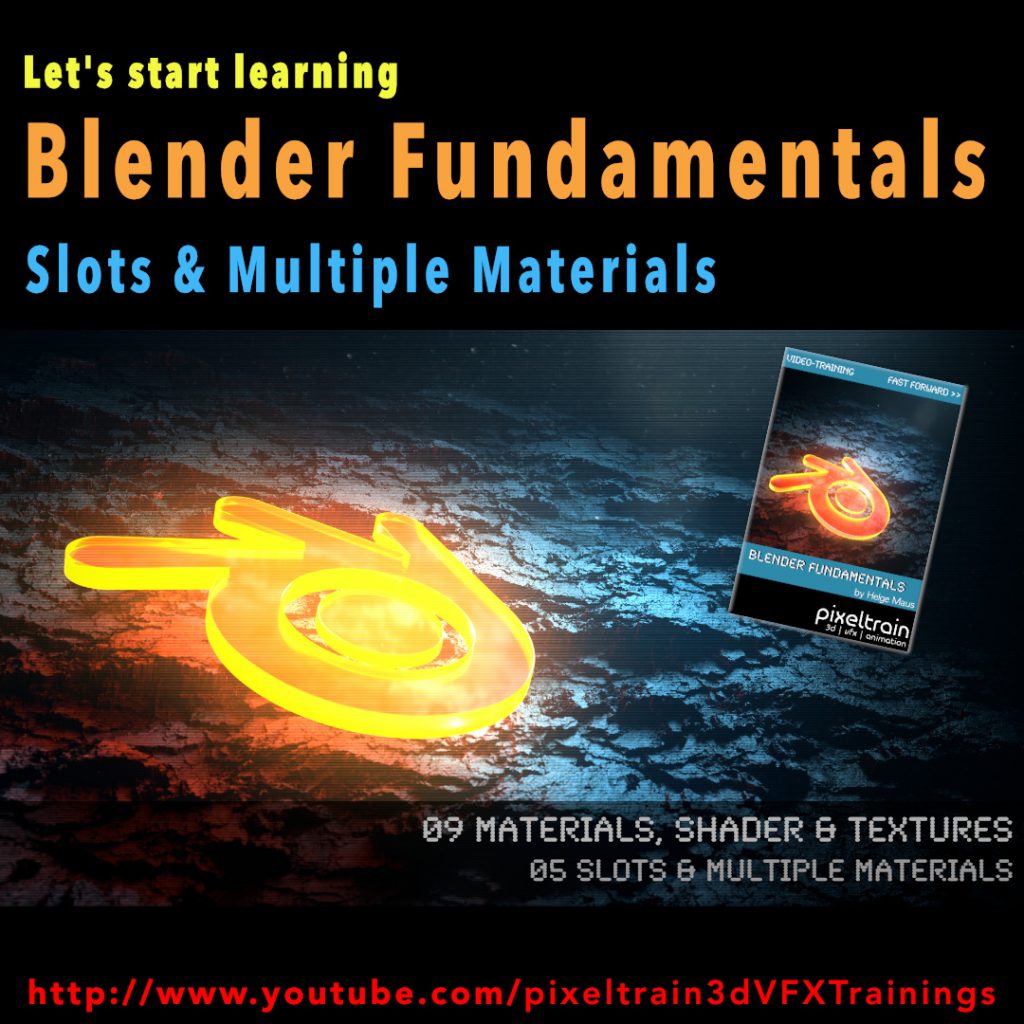
This tutorial is a demo lesson from my Publication „pixeltrain Blender Fundamentals >> Fast Forward“.
In this tutorial, you will learn how to assign Materials through the slot system of Blender to mesh parts. You will understand what a. slot is, how to make effective selections and assignment and how to assign multiple Materials to one mesh.
Here are the links for my Blender Fundamentals publication. In over 120 lessons with a duration of 20+ hours, I will take you through the complete fundamentals of Blender and the basic workflows you need to know to get started with this amazing free software.
 YouTube Trailer
Blender Market
https://blendermarket.com/products/pixeltrain-blender-fundamentals-fast-forward
VIMEO Video-on-Demand
https://vimeo.com/ondemand/blenderfundamentals
GUMROAD
https://pixeltrain3d.gumroad.com/l/BlenderFundamentals
00:00 Overview of the series and the lesson
01:06 Slots & Multiple Materials
01:26 Working with the local Mode
02:00 Basic Material assignment
02:15 Adding an additional Material slot
02:30 Understanding Slots in the Properties & Shader Editor
03:28 Assigning Faces to a slot
04:43 Selecting faces from an assignment
06:07 Selection faces more effectively
07:06 Re-assign a Material
07:34 Going out of Local mode
08:00 Assigning Slots without Materials
08:33 Changing the Material of a slot
If you have questions or topics, which should be added, please let me know.
If you want to support me for publishing more free tutorials you could
join my Patreons: 👉 https://www.patreon.com/pixeltrain3d
or give me a fast Coffee time Tip: 👉 PayPal: https://paypal.me/pixeltrain
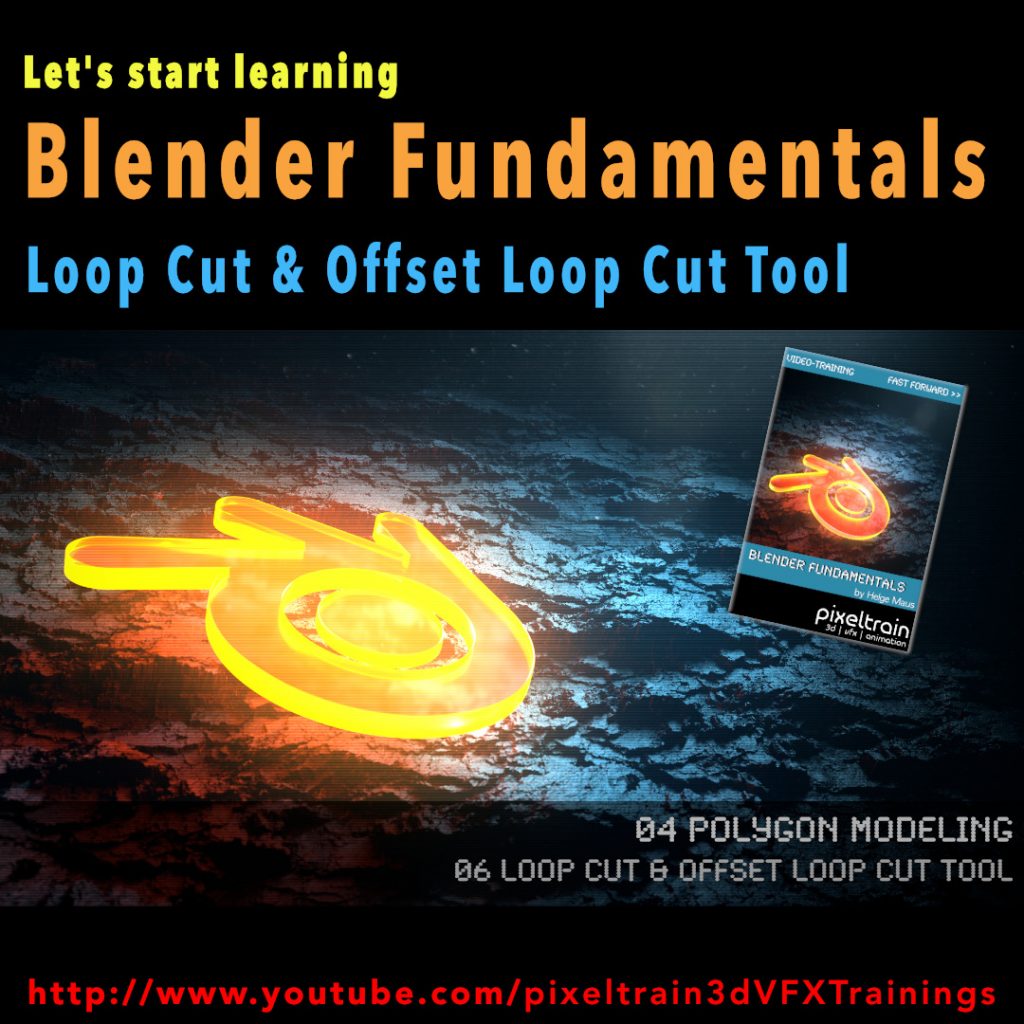
This tutorial is a demo lesson from my Publication „pixeltrain Blender Fundamentals >> Fast Forward“.
In over 120 lessons with a duration of 20+ hours, I will take you through the complete fundamentals of Blender and the basic workflows you need to know to get started with this amazing free software.
In this tutorial, you will learn the use of the LoopCut tool and the Offset Edge Loop Cut tool. First you will see how to work with these tools from the Quick tools menu and all the options, then we will look into the keyboard shortcuts and options keys for faster access. At the end, Helge shows how to double edges with the Bevel shortcut as an alternative.
Here are the links for my Blender Fundamentals publication:
👉 YouTube Trailer
👉 Blender Market
https://blendermarket.com/products/pixeltrain-blender-fundamentals-fast-forward
👉 VIMEO Video-on-Demand
https://vimeo.com/ondemand/blenderfundamentals
👉 GUMROAD
https://pixeltrain3d.gumroad.com/l/BlenderFundamentals
00:00 Overview of the series and the lesson
01:06 LoopCut tool & Offset Loopcut tool
01:30 Using Loop Cut from the Quick tools
01:50 Making a loop cut
02:30 Options of the loop cut
04:00 Sliding the cut
04:45 Working with referenced edges
05:20 Options Even and Flip
06:20 Adding loop cuts with shortcuts
07:30 Options Even and Flip with shortcuts
08:30 Offset Edge Loop Cut tool
10:09 Working with the shortcut
10:37 Working with edge bevel as an alternative
If you have questions or topics, which should be added, please let me know.
If you want to support me for publishing more free tutorials you could join my Patreons:
👉 https://www.patreon.com/pixeltrain3d
or give me a fast Coffee time Tip:
👉 PayPal: https://paypal.me/pixeltrain