
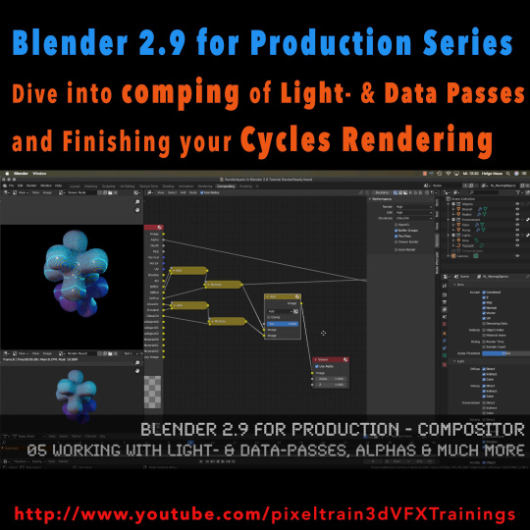
The first module of my „Blender 2.9 for Production“ series is done. In this first module we’ve talked about the build-in node-based Compositor of Blender 2.9 and how to work with it in an effective integrated workflow. You have learned how you set up Render-Layers and -Passes and how to work also with external OpenEXRs from other 3D-Applications and Renderers. My conclusion is, that this Compositor is a really powerful addition to every workflow and I am hoping for more improvements in the future.

01 Introduction to the Blender Compositor Workflow

02 Basic Compositing Tasks in Blender 2.9 Compositor

03 RenderLayers, Collections & Ray-Visibility

04 RenderLayers, LightPasses & DataPasses

05 Working with Light- & Data-Passes, Alphas and much more

I hope, you enjoyed this series and learned a lot. But for now I will dive into the new Houdini 18.5 stuff.

Let’s say it like that „I will be back“ 😉 Blender 2.91 is around the corner and I will continue this „Blender 2.9 for Production“ series with the 2D- & 3D-Tracking system.

If you have questions or topics, which should be added, please let us know.


If you like Helge’s Tutorials, give him some support to go on!

If you want to support Helge Maus for publishing more free tutorials, you can join his Patreons:
https://www.patreon.com/pixeltrain3d

Or if you want to buy me a coffee or pizza, here’s my Tip Jar:
https://www.paypal.com/donate/?hosted_button_id=72PHXB852BW5A

Thanks for your support!


Find more information on www.pixeltrain.net

YouTube: https://www.youtube.com/pixeltrain3DVFXTrainings

VIMEO: vimeo.com/pixeltrain

LinkedIn: linkedin.com/in/pixeltrain

Artstation: https://www.artstation.com/pixeltrain

Instagram: https://www.instagram.com/pixeltrain3d/

Facebook: https://www.facebook.com/helge.maus

Twitter: https://twitter.com/pixeltrain
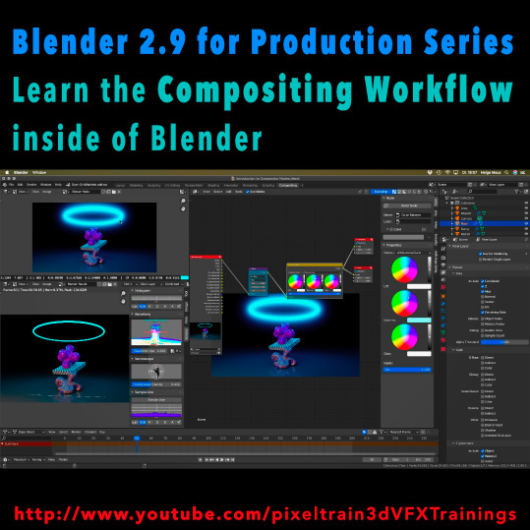
Learn the Compositing Workflow inside of Blender!

Today, I have started a new tutorial series for Blender 2.9 “Blender 2.9 for Production”.

This tutorial series „Blender 2.9 for Production“ focuses on Blender 2.9 as a full Production Suite for (Indie) 3D- & VFX Productions. In this tutorials, I will explain how to work with the different Modules of Blender 2.9 and how they are connected to each other. I will give you an introduction of the specific functionalities, but also the production context and workflows, which can help you to use Blender in your productions.

The first tutorial is online now on my YouTube – enjoy!

These topics are covered:
  • Overview over the series
  • Understanding the Blender Render Process
  • Rendersettings
  • Image Editor Window
  • Direct Saving of Render Results
  • Images in Blender’s Memory
  • Re-open a previous render
  • Slots for Comparison
  • View Layers (Renderlayers) & Render-Channels / Passes / AOVs
  • Differences in saving Stills vs. Animations
  • Understand Blender’s Post Processing Pipeline
  • Adding Channels in the View Layer Properties
  • Denoising Data, Mist, Cryptomatte Passes
  • Renderlayers & Composite Node
  • Loading pre-rendered images or sequences
  • Outputting compositing results as EXRs
  • Adding Output Channels for the EXR export
  • Using the Node Wrangler
  • Adding useful Keyboard Shortcuts
  • Node Search Shortcut
  • Adding some Quick Favorites
  • Adding Nodes to the stream
  • Deleting Nodes
  • Working effective with the Viewer Node
  • Backdrop Image / Image Viewer
  • Saving out final stills directly
  • Finding the control widgets for special nodes
  • Performance Settings
  • Sampling Colors
  • Float normalized Colors Adding a Glow
  • Rendering & Comping a whole animation at once

If you have questions or topics, which should be added, please let us know.

If you want to support Helge Maus for publishing more free tutorials you could join his Patreons: https://www.patreon.com/pixeltrain3d

Find more information on pixeltrain.de YouTube: https://www.youtube.com/pixeltrain3DVFXTrainings

VIMEO: vimeo.com/pixeltrain

LinkedIn: linkedin.com/in/pixeltrain

Artstation: https://www.artstation.com/pixeltrain

Instagram: https://www.instagram.com/pixeltrain3d/

Facebook: https://www.facebook.com/helge.maus

Twitter: https://twitter.com/pixeltrain
Start your Blender 2.9 Journey now!
Blender 2.9 – A full production suite for 3D, VFX and Animation.


Next to my beloved Houdini FX, Blender is for me the solutions for Modeling, Animation and PreViz.

As you may have seen, I have published the last days 4 free tutorials about the new features of Blender 2.9.
You find them on my YouTube channel: https://www.youtube.com/pixeltrain3DVFXTrainings


If you now have the feeling, that you want to start seriously to learn this great free production suite, here are some event tips, where I will be teaching Blender for you.


>> VIEW CONFERENCE 2020, Oct 18 – 23

https://www.viewconference.it/

The next live workshop will be at the exciting VIEW CONFERENCE 2020 – on-site and online
I will give a 2-hours Workshop:

“Blender 2.9: The Free Production Studio for Indies“

in Room Mezzanino on Sunday 18th Oct 2020 in English.

You find more Information about the Online-Workshop here: https://www.viewconference.it/article/384/blender-29-the-free-production-studio-for-indies
And, don’t miss all the other great Keynotes, Masterclasses and talks. This conference is great!


>> Blender-Trainings – Visualisierungs-Akademie Schweiz, Nov & Dec 2020

https://visualisierungs-akademie.ch/

In Cooperation with Visualisierungs-Akademie Schweiz, I will teach again some online sessions for small groups of 4-8 attendees. This is in german language. If you are interested in an English workshop, please let me know!


Blender 2.9 – EinfĂŒhrungskurs

Date: 26 and 27 November, 2020 – online
You find more Information about the Training here: https://visualisierungs-akademie.ch/bildung/blender-einfuehrungskurs/

Blender 2.9 – Rendering mit Eevee und Cycles

Date:04 December, 2020 – online
You find more Information about the Training here: https://visualisierungs-akademie.ch/bildung/blender-vertiefung/

Blender 2.9 – Animation & Rigging

Date: 10 and 11 December, 2020 – online
You find more Information about the Training here: https://visualisierungs-akademie.ch/bildung/blender-animation/


If you have questions or your company wants to adapt Blender (or Houdini FX) to the pipeline, get in contact. I’m happy to help!


Hello Houdini Beginners,

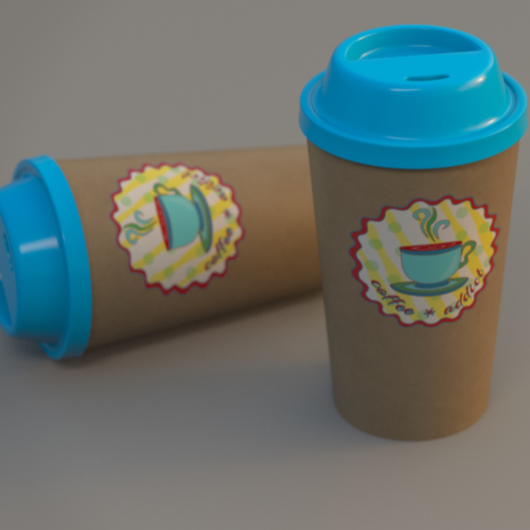
The first module of my free “Houdini FX Practice Hour” project “CoffeeCup” is finished!

Over the course of 13 lessons, you will learn the basics of the Houdini Polygon Modeling tools and how to get into a procedural approach with selections, groups and a little bit of HScript.


You will learn how to work with UVs and build a workflow between Houdini and Substance Painter.

We will render our scenes in Mantra.

In two bonus lessons, we dive deeper into the Classic Material Workflow between Houdini and Substance Painter 2020 and the new UDIM based workflow.

I hope, some of you find this useful.

Here is the full playlist:
https://www.youtube.com/playlist?list=PLp90cx0wSyKadoPBBcMQCSwtTAMBtXPIM

These lessons are meant as an addition to the other two Houdini Practice Hour projects (Banana and Toothbrush), so if you want to follow the complete learning path, you should begin with these. 


Have fun!

Helge

If you want to support me for publishing more free tutorials, you could join my Patreons: https://www.patreon.com/pixeltrain3d

Or you can download the Project files on Gumroad: https://gumroad.com/pixeltrain3d

This tutorial series „Houdini Practice Hour“ is meant for newbies in Houdini FX, who want to learn the basic tasks of modeling, uvs, shading, lighting and rendering on a project base in Houdini FX. I will explain you step by step the workflows and tools, so you can follow along and then experiment to deepen your knowledge. Learning means „getting your hands dirty“. This series doesn’t give you the most effective, elegant or the “only right way”, it’s concepted to give you a solid learning experience.

If your are searching for a complete introduction into the fundamentals of Houdini FX, you can take a look here: https://vimeo.com/ondemand/houdinifxfundamentals

Link to the YouTube-Playlist “Houdini FX Practice Hour”:
https://www.youtube.com/playlist?list=PLp90cx0wSyKZ2Nxnyp4W-EeaEQBp53k-f

If you have questions or topics, which should be added, please let us know.

Find more information on pixeltrain.de YouTube: https://www.youtube.com/pixeltrain3DVFXTrainings

VIMEO: https://www.vimeo.com/pixeltrain

LinkedIn: https://www.linkedin.com/in/pixeltrain

Artstation: https://www.artstation.com/pixeltrain

Dear Houdini FX Enthusiasts,

What keeps you up in long nights sitting in front of your screen?

Right, Coffee 🙂 Today, I have finished the first 4 hours module of my new free “Houdini FX Practice Hour” project “Coffee Cup”.

My focus this time was showing you the first steps in approaching procedural Polygon Modeling in Houdini FX. We talk about groups, channel referencing and we write some snippets of HScript. We also talk about different UV Tools inside of Houdini and look into the exchange workflow of the Model with external Painting Applications like Substance Painter, 3D-Coat and Mari. Yes, I also show how to layout UVs in a UDIM workflow. At the end of this first module, we build a Mantra Rendering scene and use the painted textures. I will release some bonus lessons about the Painting process in Substance Painter and 3D Coat, using UDIMs next week, so please have some patience.

YouTube: https://www.youtube.com/pixeltrain3DVFXTrainings

These lessons are beginners level and are building on the other two finished Houdini Practice Hour Projects “Banana” and “Toothbrush”.
I hope, you find them useful and have some fun.

Kind regards,
Helge

In this tutorial, you will learn how to unwrap the coffee cup and the lid with different UV nodes inside of Houdini FX.

We will take a look in the powerful UV Flatten node, but also UV Project and UV Unwrap.

Then we talk about layouting your UVs and I show you how to work with UDIMs.

These topics are covered:

  • UV Flatten Node
  • Cut Seams Tool
  • Making Cuts & Loop Cuts
  • Sew Tool
  • Visibility Node
  • Finding UV Distortions & UV Overlaps
  • Unwrapping the Cup
  • UV Project Node UV
  • Unwrap Node
  • Unwrapping sequentially
  • Pre-Selecting areas with Groups & expressions
  • Preserving existing seams
  • UV Layout Node
  • Layouting the islands
  • Layout with UDIMs

If you want to support me for publishing more free tutorials, you could join my Patreons: https://www.patreon.com/pixeltrain3d

Or you can download the Project files on Gumroad: https://gumroad.com/pixeltrain3d

This tutorial series „Houdini Practice Hour“ is meant for newbies in Houdini FX, who want to learn the basic tasks of modeling, uvs, shading, lighting and rendering on a project base in Houdini FX.

I will explain you step by step the workflows and tools, so you can follow along and then experiment to deepen your knowledge.

Learning means „getting your hands dirty“. This series doesn’t give you the most effective, elegant or the “only right way”, it’s concepted to give you a solid learning experience.

If your are searching for a complete introduction into the fundamentals of Houdini FX, you can take a look here: https://vimeo.com/ondemand/houdinifxfundamentals

Link to the YouTube-Playlist “Houdini FX Practice Hour”:
https://www.youtube.com/playlist?list=PLp90cx0wSyKZ2Nxnyp4W-EeaEQBp53k-f

If you have questions or topics, which should be added, please let us know.

Find more information on pixeltrain.de YouTube: https://www.youtube.com/pixeltrain3DVFXTrainings

VIMEO: https://www.vimeo.com/pixeltrain

LinkedIn: https://www.linkedin.com/in/pixeltrain

Artstation: https://www.artstation.com/pixeltrain

This time I talked too much and so our “Houdini FX Practice Hour” tutorials are a little bit late. But, I think you will like them. 3 new lessons …

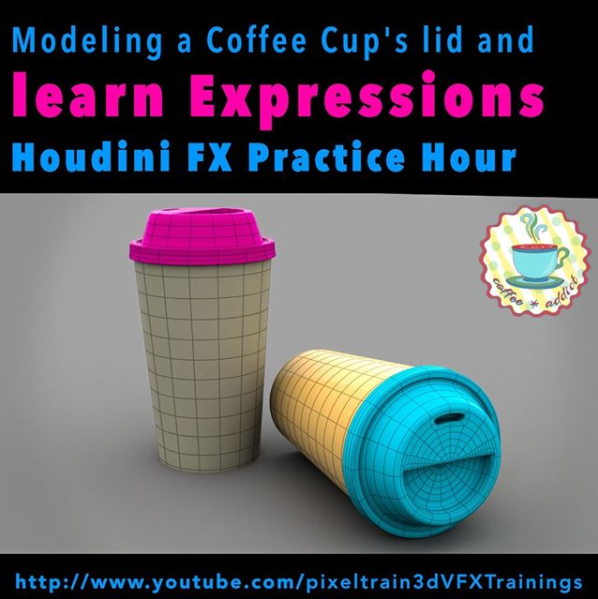
This time we finish the lid of our coffee cup – again with procedural Polygon Modeling – and you will learn a little bit more Houdini HScript expressions as helpers. Also you will see how to make your own Houdini shelf, add a node presets …

Ok, enough, here is the link to my YouTube:

https://www.youtube.com/pixeltrain3DVFXTrainings

See you next week and if you like the content, please LIKE and SUBSCRIBE 😉

In this tutorial, you will learn the conceptional differences when working in a direct or procedural modeling approach.

Also, we discuss, how you branch out in larger trees to add more details and use channel expressions, again.

These topics are covered:

  • Direct Modeling vs Procedural Modeling
  • Discussion, why to use boolean sops as helpers
  • Fast ways to set flags in large node trees
  • Branching out for cup lid
  • PolyExpand2D Node
  • Using Channel References
  • Finishing the top of the lid

Playlist: Learn Houdini VFX with Helge Maus / pixeltrain

This tutorial series „Houdini Practice Hour“ is meant for newbies in Houdini FX, who want to learn the basic tasks of modeling, uvs, shading, lighting and rendering on a project base in Houdini FX.

I will explain you step by step the workflows and tools, so you can follow along and then experiment to deepen your knowledge. Learning means „getting your hands dirty“. This series doesn’t give you the most effective, elegant or the “only right way”, it’s concepted to give you a solid learning experience.

If you are searching for a complete introduction into the fundamentals of Houdini FX, you can take a look here:

https://vimeo.com/ondemand/houdinifxfundamentals

Helge Maus teaches 3D- & VFX Applications for 20 years. His focus lies on VFX, but he also works with many studios and agencies from different visualization areas. If you have questions or topics, which should be added, please let us know.

If you want to support me for publishing more free tutorials, you could join my Patreons: https://www.patreon.com/pixeltrain3d

Or you can download the Project files on Gumroad: https://gumroad.com/pixeltrain3d

If you have questions or topics, which should be added, please let us know.

Find more information on pixeltrain.de YouTube: https://www.youtube.com/pixeltrain3DVFXTrainings

VIMEO: https://www.vimeo.com/pixeltrain

LinkedIn: https://www.linkedin.com/in/pixeltrain

Artstation: https://www.artstation.com/pixeltrain

***

It’s finally done! Helge and his team worked for more than a year on this epic publication and are happy and proud to be finally able to tell you all about it. So here are the details about the contents of this video-tutorial:

This publication “pixeltrain – Houdini FX Fundamentals >> Fast Forward“ by experienced trainer Helge Maus is a complete Introduction to Houdini FX.

In 117 lessons with a duration of 18,5 hours, your instructor Helge Maus provides you with a step by step approach to understanding Houdini FX and its workflow as a fully featured 3d application.

This training is designed to get you up and running quickly, enabling you with the skills needed to work effectively in this incredibly powerful 3d and vfx package. Additionally, it lays the foundation of essential concepts and paradigms to understand more advanced topics for other modules of Houdini FX down the road.
In this course, Helge Maus starts from the ground up providing you with a solid and practice-oriented foundation in Houdini FX.

First, he takes you through the user interface, followed by an exploration of the different levels and contexts of a Houdini project. You will conclude by learning how to manage these concepts through the production cycle within Houdini FX.
You will write your first expressions in Hscript. Therein, you will learn the concepts of dependencies between objects, explore using groups and packed geometries and finish by building your first asset.
Once you have those primary skills under your belt, Helge gives you a brief introduction into working with VOPs (vex visual scripting), Digital Assets, Volumes and VDBs.
After that, you will start learning the basics of modeling inside of Houdini FX. You will begin with the basics of NURBS Curves and generating surfaces, followed by the powerful and flexible polygon modeling tools.
Important topics like Deformations and UVs are explained in-depth and demonstrated.
After you have learned to build your assets, you will assemble your scene, set cameras with physical attributes, and finish with lighting and shading.

Helge wraps up with a practice-oriented introduction of rendering techniques using the Houdini Mantra renderer.
After finishing this training you will have the skills needed to understand the more advanced workflows and modules of Houdini FX.

Topics included:

01 Welcome to Houdini FX [01h 52m]
02 Basic Concepts in Houdini FX [02h 57m]
03 VOPs & Digital Assets [01h 44m]
04 Volumes & VDBs in Houdini FX [01h 04m]
05 Working with Curves [00h 57m]
06 Generating Surfaces [01h 16m]
07 Polygon Modeling [01h 45m]
08 Retopo, PolyBuild & Boolean [01h 04m]
09 Deformations [00h 44m]
10 UVs in Houdini FX [01h 22m]
11 Lighting & Cameras [01h 21m]
12 Shading [01h 54m]
13 Rendering [00h 43m]

You can find the entire table of contents here >> pixeltrain.de/images/stories/Houdini_FX_Fundamentals_Content.pdf

These tutorials were created using mostly Houdini 17.5. However, we made sure that everything will work in Houdini 18+. Also, you will receive subsequent information about any version-based technical changes as needed.

After purchasing these tutorials, please contact us by email (info(at)pixeltrain.de), so that we can send you a dropbox link to the training material.
If you have any problems or questions don’t hesitate to write to us.

***

If you want to support Helge Maus for publishing more free tutorials you can join his Patreons:
patreon.com/pixeltrain3d

***

Find more information on pixeltrain.de/en
VIMEO: vimeo.com/pixeltrain
LinkedIn: linkedin.com/in/pixeltrain
Artstation: artstation.com/pixeltrain

***

We hope, you like this tutorial. We hope, you find it helpful in learning and understanding Houdini FX. It was a pleasure creating this little masterpiece 😉 and Helge and his team will go on producing more tutorials with even more experienced topics. So stay tuned! We appreciate it and wish you all the best and fun in learning Houdini FX!

Helge and his team

Here are two examples taken from the publication:

***

21. – 25. Oktober 2019, Turin

Helge’s MASTERCLASSES auf der VIEW Conference 2019:

>> Sonntag, 20. Oktober 2019, 15.00 – 18.30, Sala Mezzanino: 

 Blender 2.8 – The Free Production Studio for Indies

In dieser Masterclass gibt Euch Industry Master-Trainer Helge Maus einen schnellen Überblick ĂŒber Blender 2.8, die OpenSource Production Suite fĂŒr 3D, VFX & Animation. Blender 2.8 ist kostenlos zu verwenden, aber fĂŒr ernsthafte Produktionen unglaublich leistungsfĂ€hig und vollwertig. Das Feature-Set ist sehr umfangreich und hilft KĂŒnstlern, ihre Visionen zum Leben zu erwecken, ohne mit Abonnements, GebĂŒhren und EinschrĂ€nkungen zu kĂ€mpfen.

Folgende Funktionen und Bereich werden wir uns in dieser Masterclass genau ansehen:

– Modeling Workflow
– Lighting, Shading & Rendering mit Realtime Engine Eevee und Cycles
– Compositing in Blender 2.8
– Concepting mit Sculpting und 2D-Animationen (Grease Pencil)
– Animation-Workflow & Rigging
– VFX mit MotionTracking
– Physics (Fire, Smoke, Particles)
– NĂŒtzliche Add-ons

>> Montag, 21. Oktober 2019, 16.00 – 19.00, Tecca 3: 


  Houdini FX MotionGraphics Masterclass

Helge Maus zeigt in dieser Masterclass, wie Ihr mit den MotionGraphics- und Design-Funktionen von Houdini FX atemberaubende Standbilder und Animationen erstellen. Er zeigt, wie das leistungsstarke Partikelsystem zum Erzeugen von Spuren, Weichkörpern, StrĂ€ngen und Stoffen (Vellum) fĂŒr MotionDesign verwendet wird. Helge Maus wird sich die kostenlosen MOPs – Motion Graphic Nodes For Designers – vornehmen und Ihnen erklĂ€ren, wie diese in Houdini FX eingesetzt werden.

SideFX, der Hersteller von Houdini FX, bietet Indies die großartige Houdini Indie-Version an. Es stellt ein vollwertiges Houdini FX dar mit sehr wenigen EinschrĂ€nkungen. Die Houdini Indie-Version kostet nur 269 USD pro Jahr oder 399 USD fĂŒr 2 Jahre.


Weitere Infos gibt’s hier:
www.sidefx.com/products/houdini/houdini-indie/

>> Dienstag, 22. Oktober 2019, 15.00 – 18.30, Sala Mezzanino: 


  Houdini FX for Indies Masterclass

Helge Maus (pixeltrain) zeigt Euch, wie Ihr mit Houdini FX als Generalist / “One Man Band Studio” arbeiten. Neben der Verwendung von Houdini FX als vollwertige 3D-Anwendung zum Modellieren, Schattieren und Beleuchten, Animieren und Rendern bringt er Euch die ersten Schritte zur Verwendung der erstaunlichen VFX-Tools wie Partikel, Pyro FX und FlĂŒssigkeiten bei.

SideFX, der Hersteller von Houdini FX, bietet Indies die großartige Houdini Indie-Version an. Es stellt ein vollwertiges Houdini FX dar mit sehr wenigen EinschrĂ€nkungen. Die Houdini Indie-Version kostet nur 269 USD pro Jahr oder 399 USD fĂŒr 2 Jahre.


Weitere Infos gibt’s hier:
www.sidefx.com/products/houdini/houdini-indie/


Bitte bringt Euren eigenen Laptop mit. Falls Ihr Houdini FX oder Houdini Indie noch nicht haben, könnt Ihr auch die kostenfreie Houdinin Apprentice Version nutzen, die Ihr auf der Webseite von sideFX findet. 

Unter folgendem Link gibt’s noch unendlich viel mehr Information zur diesjĂ€hrigen VIEW Conference https://www.viewconference.it/pages/program/. 
Geniale KĂŒnstler und ein wieder ĂŒberaus bereicherndes Programm erwarten Sie in Turin im Herbst! 
Be there! Ci vediamo!

WOW, dieses Event hat’s in sich. Im Herbst 2018 durfte Helge dort einen Workshop halten. pixeltrain verbrachte dort zwei Tage und die waren viel, viel zu kurz. Dieses Event hat uns direkt ins Herz getroffen. Maria Elena Gutierrez, die Mama der View – wie sie sich selbst nennt – hat uns mit ihrer herzlichen Begeisterung fĂŒr KreativitĂ€t und die Menschen, die KreativitĂ€t leben, mitgerissen und mit dem VIEW Fieber angesteckt. 

Wir kamen auf der VIEW an und ein Teil unserer Herzen ist wohl dort geblieben – so pathetisch es sich anhört, aber dieses Event hinterlĂ€sst Spuren.

Deshalb freuen wir uns umso mehr, auch in diesem Jahr wieder dabei sein zu können. Dieses Mal aber fix fĂŒr die gesamte Event-Zeit! 

Warum sind Helge Maus und pixeltrain so von der VIEW begeistert?

Maria Elena Gutierrez schafft es die CrĂšme de la CrĂšme nach Turin einzuladen:

2018 konnte man Hans Zimmer dort sprechen hören. Mireille Soria, die PrĂ€sidentin von Paramount erzĂ€hlte ihre Geschichte, wie sie zu den Geschichten kam und was sie bis heute so am filmischen GeschichtenerzĂ€hlen liebt.

Rob Bredow, Head of ILM, gab Einblicke in das Entstehen von “SOLO: A Star Wars Story”. Wir durften Emanuela Cozzi, Storyboard Artist bei LAIKA, zuhören, wie sie ĂŒber ihren Zugang zum Storyboarding sprach. Sie erzĂ€hlte aus ihrem Leben als Storyboard-Artist und es war ebenso faszinierend, wie all die anderen wertvollen VortrĂ€ge von so vielen genialen Artists, nicht zu vergessen Michael Ford, der VFX Supervisor von Hotel Transsilvanien 3 ist.

Man muss die VIEW erleben und man weiß, dass dieser Event pure Inspiration und Begeisterung hinterlĂ€sst.

Deshalb >> Ci vediamo a Torino! … wir können’s kaum erwarten! Danke Maria Elena fĂŒr Deine Energie und dieses Event!

www.viewconference.it

>> MOUVO – Education in Motion

22. – 23. Februar 2019, Prag


“Mouvo – Festival presenting Motion Design in all of its forms.

Ubiquitous and creative dynamic field, combining graphic design, animation, video, special effects and new technologies.

Mouvo festival is a meeting place for all the thinkers, talents and producers around the world, who would like to cooperate and meet others from the community, those who are eager to learn, inspire and to be inspired.”

www.mouvo.cz


Helge wurde als Vortragender auf das Mouvo Festival in Prag eingeladen. Damit wird dieses Motion Design Festival das 3D & VFX Eventjahr 2019 fĂŒr pixeltrain einlĂ€uten. Nach der Mouvo folgt die FMX in Stuttgart und dann im Herbst wieder unsere liebgewonnene VIEW Conference in Turin.
JA, pixeltrain goes Europe und wir freuen uns schon sehr auf dieses coole Event-Jahr! Let’s celebrate 3D, VFX creativity and mind :-)!


Helges HOUDINI FX-Workshop auf der MOUVO ist am 22. Februar 2019 von 14.00 bis 18.00 Uhr

Topic:

sideFX Houdini VFX | MotionGraphics & Abstracts

In this workshop, Helge Maus (3D & VFX Trainer) teaches you how the procedural approach and the various VFX Tools of Houdini FX can help you to be more effective in the fields of Motion Graphics, Creation and Commercials. By working through different examples Helge shows you, how Particles, Pyro, Wires, Cloth and Rigid Body Simulations can be used to generate exciting abstracts and animations.


Außerdem hĂ€lt Helge eine Presentation zu den neuen Features von
Cinema 4D R20 am 23. Februar von 13:00 bis 14:30.
Bei dieser Presentation setzt er den Fokus vor allem auf FIELDS & VOLUMES.

Mouvo verspricht ein tolles Event zu werden. Das Eventjahr 2019 wird eingelĂ€utet. Hier gibt’s mehr Infos zu dem Line-up der Speaker >> https://mouvo.cz/lineup/ 


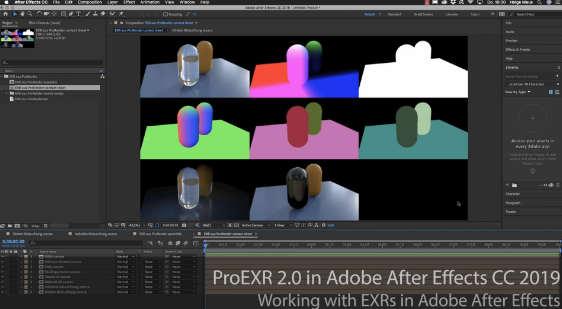
In Helges neuesten, kostenfreien Video-Tutorials geht es um das kostenfreie PluginProEXR 2.0 (https://www.fnordware.com/ProEXR/) fĂŒr Adobe After Effects CC.

Dieses Plugin erlaubt es, Adobe After Effects Arists endlich komfortabel mit multi-channel EXRs zu arbeiten und auch noch Cryptomattes direkt in AEX nutzen zu können. Damit rĂŒckt After Effects ein StĂŒck nĂ€her an die VFX-Pipelines der großen Studios heran.


Im ersten Tutorial stellt Euch Helge das kostenfreie Plugin ProEXR 2.0 (https://www.fnordware.com/ProEXR/) vor, mit dem Ihr ganz einfach KanĂ€le aus den EXRs extrahieren könnt. Außerdem könnt ihr automatisch ein gesamtes Composite von allen Ebenen einer EXR-Datei ausgeben lassen. Zudem auch ein Layer-Contact Sheet. Zu Beginn des Tutorials gibt’s eine kurze EinfĂŒhrung in das klassische Arbeiten mit Multi-Channel EXRs in After Effects CC 2019.


Im zweiten aufbauenden Tutorial erklĂ€rt Euch Helge dann, was Cryptomattes sind, wo ihr passende Informationen ĂŒber Renderengines und die Verwendung findet und natĂŒrlich wie diese nun in After Effects CC 2019 eingesetzt werden können. Dabei wird gezeigt, wie Ihr aus einem 3D-Rendering on-the-fly Masken generieren könnt. HierfĂŒr benötigt Ihr das im ersten Tutorial vorgestellte freie ProEXR 2.0 Plugin.


Übrigens, wer mehr ĂŒber das Rendern von Cryptomattes aus Houdini oder aus Cinema 4D erfahren will, findet hier zwei Links zu bereits veröffentlichten Tutorials:

Introduction to Cryptomatte for Houdini FX (engl)


Introduction Cryptomatte für Cinema 4D & Arnold 5 (dt)


Falls Ihr Euch tiefer in Adobe After Effects einarbeiten möchtet und Euch das Kreieren von MotionGraphics fasziniert, denkt daran, dass Ihr das von Helge in einem seiner Trainings lernen könnt, egal ob online, on-site oder bei uns im pixeltrain studio mit dem superduper Helge-bleibt-im-studio-Rabatt fĂŒr Euch 😉 >> www.pixeltrain.de