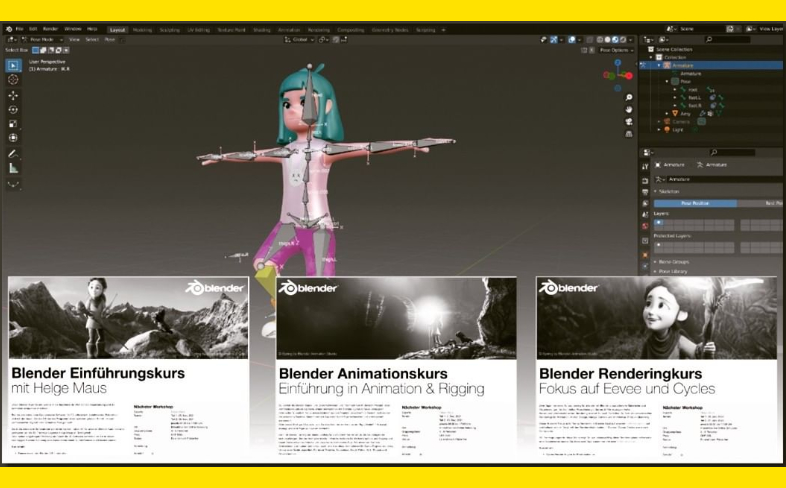
Helge is speaking about Blender at the amazing Girona Film Festival on Saturday, Nov. 12, 10:00 – 12:00

Great to see Blender in action on so many creative projects. Here’s the full program:
https://programa.gironafilmfestival.com

My sessions are Saturday, Nov. 12, 10:00-12:00:

Blender 3.3 – The free Production studio for Indies
Blender 3.3 – Rigging, Animation & non-realistic rendering (NPR)

Blender BagaPie V7 Addon

Do you know BagaPie?

The BagaPie Modifier is an “all in one” free Blender addon, you can use it for any purpose by Antoine Bagattini.

Also watch the version V6 reel to understand a little bit more, what this great tool is capable of: https://youtu.be/FlLotEd0zFU 

And the BagaPie version for Blender 3 feature reel:


It started as a collection of cool tools for lazy artists and has evolved over the last versions to a very powerful and useful multi tool for all kinds of operations.

I mostly use it for Scattering purposes of my own assets for nature scenes.
If supports a really fast scatter process, an easy to use Painting system for you instances, Proxies and also Camera Culling. Wow, and that’s for free!

But if you like the addon, you can get also the BagaPie Asset collection (around $55) which gives you around 200+ environment assets for your scenes.

More information and the free download:

https://abaga.gumroad.com/l/BbGVh?_gl

Hope you like it!

Helge

Blender Hair Curves - Project Heist

The next version of Blender, version Blender 3.3 LTS, is coming at the beginning of September 2022. At the moment I am testing the Alpha version to follow the developent of the new features of this version. As a LTS version, it will then receive bugfixes for 2 years, so it is a big milestone for development and production.

One of the most exciting features will be the new Hair system, which will be based on curves. The existing Hair system of Blender uses the Particle system, which is great, but also a little bit “old-school”.

Through geometry nodes it is possible to build your own geometry generators and procedural modifiers. Now with this new curve based approach for Hair you can build very easily procedural modifiers for Hair, for example you build only a basic Hair groom and then the Hair is filled procedurally and also reacts to weather conditions and wetness and so on by a modifier. This is awesome!

Andy Goralczyk from Blender Studio presents a new hair system for the upcoming Blender 3.3. The new hair system uses new high performance curves objects and combine the flexibility of Geometry Nodes with powerful destructive tools for hair grooming.

You find more information here in this article:
https://code.blender.org/2022/07/the-future-of-hair-grooming/

If you have any questions, please let me know. For Blender Trainings (remote, for companies and individuals please check www.pixeltrain.net or contact me directly under info(at)pixeltrain.net ).

Have a nice weekend,

Helge

Learn the Fundamentals of the Merge tool & the almighty Channel Booleans tool in Fusion Studio.

Here is the Link to the tutorial and the whole series. VFX Compositing Techniques with Merge & Channel Booleans in Fusion Studio.

I had two great and relaxing days with my Blender 3.2 Fundamentals training attendees last week.
Such a pleasure to work with artists around the world and helping them to start their journey in this powerful environment. 🎉

Learning basic PBR Shader networks in the Blender Fundamentals training

The next two workshops (2-days, German language) will be 14.+15. July (Photorealistic and NPR Rendering) and 18.+19. August (Rigging & Animation). And, the new Blender Fundamentals training will be 29.+30. Sept 2022.

If you want to join, please contact Visualisierungs-Akademie Schweiz GmbH here:

https://visualisierungs-akademie.ch/category/bildung/

For Blender Trainings (remote, for companies and individuals please check www.pixeltrain.net or contact me directly under info(at)pixeltrain.net ).

Regards, Helge

Fusion for Production - VFX Compositing with Fusion - 02b Fusion Compositing inside DaVinci Resolve

Here is the second part of last weeks tutorial. In this second part of lesson two, we will examine how to work with Fusion inside of DaVinci Resolve. I will show you different ways of making Fusion composites, some on the timeline, but also independent from the timeline. Also, you will learn how to have several versions on Fusion comps on a Timeline Clip for making variants or versions of your work.

Then we will discuss and solve some of the most asked problems when working with Fusion inside of the DaVinci Resolve Environment, for example how to import EXR and PNG sequences from Blender and other DCCs, how and when to use MediaIn Nodes correctly, how to add Loaders and Savers to your toolbar, how to split EXRs in severals Loaders with the Hos_SplitEXR script and how to get your Linear EXRs correctly into the Viewer. 

Also, we talk very briefly about ColorManagement for VFX assets in DaVinci Resolve and where to find the Resolve FX OFX plugins, which you can directly use inside of Fusion in the DaVinci Resolve Environment.

It’s quite a long tutorial, but I believe that it gives you everything you have to know if your want to start comping with Fusion inside of DaVinci Resolve and helps you around the common pitfalls.

If you have questions or topics, which should be added, please let me know.

If you want to support me for publishing more free tutorials you could join my Patreons:

Become a Patron!

or give me a fast Coffee time tip:
PayPal: https://paypal.me/pixeltrain

Have fun!

Fusion for Production - VFX Compositing with Fusion - 02a Fusion Studio vs DaVinci Resolve Workflow

In this tutorial series, we will talk about Blackmagic Fusion Studio and Blackmagic DaVinci Resolve (Fusion page) as a professional VFX Compositing package. We will dive into basic workflows and techniques to make your daily compositing work more effective and fun.

We start this tutorial by discussing the differences between using Fusion inside of the free version of DaVinci Resolve to the paid version of Fusion Studio and DaVinci Resolve Studio. I give you a list of features, what you get in the paid versions and why they are so useful in production. Also we talk about the differences in working in Fusion Studio vs the Fusion Page in DaVinci Resolve and when which of these workflows are more useful.

After that we will dive into Fusion Studio to learn about basic Fusion concepts, beginning with the User Interface, Node Trees, Tools and a first composite from Loader to the Saver for the final output. This should help you to understand Fusion as a node-based compositor and helps you in understanding the more advanced workflows in the second part of this lesson, which will then dive into Fusion Compositing inside of the DaVinci Resolve Environment.

These topics are covered in this tutorial:

00:00 Overview of the series

00:28 Topics list for lesson 02, part 01 & part 02

03:45 DaVinci Resolve / Fusion Studio free vs. Paid

08:34 Fusion Studio UI Overview

10:36 Compositing Settings / Global Settings

11:36 Frame Format, Frame Rate fps and Color Depth

12:53 Adding Nodes & Tools

14:05 Loading footage

14:22 Preview options in the Loader tool

15:21 Working with the Fusion Viewer

16:23 Adjusting the compositing length

17:09 Preview area in the timeline

17:35 Caching the timeline

18:20 Loading additional logos

19:07 Adding a text tool

19:24 Adding a sequential node

20:04 Arrange tools in the node graph

20:23 Merge Node and Transformations

20:35 Auto Proxy option in the Viewer

21:00 Faster ways of merging Nodes

21:53 Outputting a compositing with a Saver

22:47 Output Settings

23:08 Color Depth Settings for Source Nodes

24:16 Loader Setting for the import

25:06 Starting a Render Job

25:49 Importing an EXR sequence

27:20 Viewer options for transparencies

28:22 Setting a Viewer Gamma 2.2

29:09 Changing the Gamma in the Fusion View LUT

29:54 Using the Stefan Ihringer Viewer LUTS from Reactor

30:31 Setting the Preview Range

30:39 Importance of right mouse button on ui elements

31:15 Working with Audio in Fusion Studio 

32:14 Overview over the next part of Lesson 02b

As a Senior 3D & VFX Trainer, Helge Maus teaches 3D- & VFX Applications for 20 years. His focus lies on VFX, but he also works with many studios and agencies from different visualization areas. He focuses on Houdini FX, Blender, and NUKE for his daily work and training.

If you have questions or topics, which should be added, please let me know.

If you want to support me for publishing more free tutorials you could join my Patreons:

Become a Patron!

or give me a fast Coffee time tip:
PayPal: https://paypal.me/pixeltrain

Find more information on www.pixeltrain.net

YouTube: https://www.youtube.com/pixeltrain3DVFXTrainings
Twitter: https://twitter.com/pixeltrain
Blog: http://www.helgemaus.com
Mastodon: https://mastodon.art/web/@pixeltrain3d
Instagram: https://www.instagram.com/pixeltrain3d/
LinkedIn: https://www.linkedin.com/in/pixeltrain/
Artstation: https://www.artstation.com/pixeltrain

Fusion for Production - VFX Compositing with Fusion - 01 Installation of Reactor in Fusion & Resolve

In this tutorial series, we will talk about Blackmagic Fusion Studio and Blackmagic DaVinci Resolve (Fusion page) as a professional VFX Compositing package. We will dive into basic workflows and techniques to make your daily compositing work more effective and fun.

This tutorial shows you how to install the free Reactor Package Manager in Blackmagic Fusion Studio and Blackmagic DaVinci Resolve and how to use it. We will install Cryptomatte, Viewershaders and the Split EXR Script for working with EXR sequences inside of Fusion and DaVinci Resolve. Also you find here hundreds of free extensions and plugins for your Fusion, helping you with VFX compositing and Motiongraphics.

These topics are covered in this tutorial:

00:00 Overview of the series
01:02 Why do you want to use Fusion as a compositor?
01:10 Fusion in comparison with Foundry NUKE
03:19 How to extend the Fusions Toolset
04:03 Reactor for Fusion and Resolve
04:55 Installing the Reactor Lua Script in Fusion Studio
06:19 Overview of the Reactor User Interface
07:28 Installing new Tools, for example, Cryptomatte for Fusion
08:58 Installing the Split EXR Script
09:30 FUI Toolset
09:44 Installing Viewer Shaders for Linear Workflow
10:24 Reactor Menu in Fusion Studio
11:02 Finding the new Tools, Scripts and ViewerLUTs
13:00 Installing the Reactor Lua Script in DaVinci Resolve
13:52 Install Cryptomatte, ViewShaders & Resolve Essentials in DaVinci Resolve
14:49 Generating a new Fusion Comp in Resolve
15:57 Finding the Reactor Window in DaVinci Resolve
16:30 Using the HoS EXR Split Script for EXR Sequences in DaVinci Resolve

As a Senior 3D & VFX Trainer, Helge Maus teaches 3D- & VFX Applications for 20 years. His focus lies on VFX, but he also works with many studios and agencies from different visualization areas. He focuses on Houdini FX, Blender, and NUKE for his daily work and training.

If you have questions or topics, which should be added, please let me know.

If you want to support me for publishing more free tutorials you could join my Patreons:

Become a Patron!

or give me a fast Coffee time tip:
PayPal: https://paypal.me/pixeltrain

Find more information on https://www.pixeltrain.net
YouTube: https://www.youtube.com/pixeltrain3DVFXTrainings
Twitter: https://twitter.com/pixeltrain
Instagram: https://www.instagram.com/pixeltrain3d/
LinkedIn: https://www.linkedin.com/in/pixeltrain/
Artstation: https://www.artstation.com/pixeltrain

We have good news for everyone who wants to dive into Blender, learn the Fundamentals, and beyond.
Together with Visualisierungs-Akademie Schweiz GmbH, I will host another season of Blender online workshops in German language this summer.
Starting in June with 2 days of Blender Fundamentals, after that in July we have 2 days deep dive into Rendering in Cycles and Eevee and then in August 2022, we finish with another 2 days Animation and Rigging in Blender.

If you are interested, please check the following dates or just write me an email (info (at) hmaus.de).

Have a wonderful time!
Yours,
Helge

Introduction to Blender
June 23 + 24, 2022
– online –

in cooperation with Visualisierungsakademie Schweiz

On June 23 and 24 I will teach you online taking your first steps in Blender.

If you are interested, please check out the detailed information here:
https://visualisierungs-akademie.ch/bildung/blender-einfuehrungskurs/

On request I also teach this online course in English. Please do not hesitate to ask your questions (info(at) pixeltrain.net). I am always happy, to hear from everyone who is interested to become an Artist in Blender, Nuke or Houdini FX.

Some of the topics you learn in this course:

  • Getting to know the Blender 3.2 Infrastructure
  • Installation, AddOns and Konfiguration
  • User-Interface and Navigation
  • Scene-Organisation, Outlines, Collections
  • Polygone-Modeling Techniques
  • Working with Curves & Surfaces
  • Modifiers
  • SubDivision Surfaces
  • UV Editor
  • Lightening, Types of Lights, Previews
  • Camera & Physical Setting
  • Materials & Shader
  • Using Textures
  • Photorealism & PBR
  • Preview with Eevee (Realtime)
  • Using Shading Workspace
  • Rendersettings with Eevee and Cycles
  • Final Rendering
  • Simple Compositing in the Compositing Workspace
  • Introduction to Sculpting Workspace
  • First Keyframes and Animationen
  • Rendering of Animations

On request I also teach this online course in English. Please do not hesitate to ask your questions (info(at) pixeltrain.net). I am always happy, to hear from everyone who is interested to become an Artist in Blender, Nuke or Houdini FX.

If you have any questions, please write me on this adress: info (at) hmaus.de.

Hope to see you soon!

Rendering in Blender with Eevee and Cycles
July 14 + 15, 2022
– online –

in cooperation with Visualisierungsakademie Schweiz

On July 14 and 15 I give an Online-Training on Rendering in Blender -> https://visualisierungs-akademie.ch/bildung/blender-vertiefung/

Two days of intensive advanced training for everyone who wants to use Blender to create sophisticated materials and visualizations for architecture, product design, games & film.
In addition to photorealistic rendering, you will also learn techniques for non-photorealistic rendering for animation, motion design, manga, comics and architecture / product sketching.

Some of the topics you learn in this course:

  • Cycles Render-Engine for Photorealism
  • Physical Lighting and Cameras
  • Eevee for Realtime Rendering
  • Shader Editor
  • Building complex Shaders
  • Creating photorealistic Materials
  • Architecture- & Design Materials
  • Detail-Sculpting & Baking
  • PBR Workflows
  • Image-Finishing with the internal Compositor
  • Exchang with Photoshop, After Effects & NUKE
  • Internal Freestyle Renderer for Sketch & Toon
  • Creating Freestyle Materials
  • Creating Comic Shader
  • Refining Comic & Manga Stile in the Compositor

For further information, please visit this website:
https://visualisierungs-akademie.ch/bildung/blender-vertiefung/

On request I also teach this online course in English. Please do not hesitate to ask your questions (info(at) pixeltrain.net). I am always happy, to hear from everyone who is interested to become an Artist in Blender, Nuke or Houdini FX.

If you have any questions, please write me on this adress: info (at) hmaus.de

Blender Animation Training
August 18 + 19, 2022
– online –

in cooperation with Visualisierungsakademie Schweiz

On August 18 and 19 I give an Online-Training on Animation in Blender -> „Introduction to Animation and Rigging“

You learn how to work with the powerful Animation Tools of Blender. You get to know helpful add-ons for MotionGraphics and Rigging and you build your first technical and organic animation rigs. We bring camera animations to life and also learn how to export these animations for game engines like Unity, Unreal or Godot. You will get to know Timeline, Dopesheet, Graph Editor, NLA, Shapes and Drivers.

  • Wichtige Blender Konzepte für Animatoren & Rigger
  • Projekteinstellungen für Animation
  • Blender Timeline
  • Keying, Keying Sets & Autokeys
  • Channels & Keyframes im Dopesheet
  • Erstellen von Playblasts
  • Motion Path Tool
  • Graph Editor & F-Curves
  • Interpolation & Handles
  • Curves Modifiers
  • Channel Groups
  • Basics des Rigging
  • Armatures
  • Aufbau von Rigs für mechanische / organische Objekte
  • Bone Layers, Bone Groups & Bendy Bones
  • Binding Meshes & Weight-Painting
  • IK Setups
  • Poses
  • Shape Keys
  • Arbeiten mit Constraints
  • Drivers & Expressions
  • Action Editor & Blender’s Action System
  • NLA System
  • Arbeiten mit Audio
  • Basics des Grease Pencil

For further information, please visit this website:
https://visualisierungs-akademie.ch/bildung/blender-animation/


Find more information on www.pixeltrain.net

YouTube: https://www.youtube.com/pixeltrain3DVFXTrainings

Twitter: https://twitter.com/pixeltrain

Instagram: https://www.instagram.com/pixeltrain3d/

LinkedIn: https://www.linkedin.com/in/pixeltrain/

Artstation: https://www.artstation.com/pixeltrain

Blender 3.0 for Production - 2D & 3D Tracking Workflow - 11 Semi-automatic Tracking Workflow

Here is the next lesson of the Tracking Workshop. This time we will talk about semi-automatic tracking, which is a way of adding many trackers for shots, where you don’t want to add supervised trackers. Hope you like the lesson 🙂